21 Brilliant Ways to Soundproof Your Noisy Apartment Walls
Living in an apartment means dealing with footsteps above, voices next door, and traffic sounds below.
You’re probably familiar with these unwanted intrusions into your personal space, but you don’t have to accept them as a permanent part of your living situation.
While complete soundproofing might seem like an impossible dream for renters, there are numerous creative and effective solutions that won’t violate your lease agreement or break your budget.
Whether you’re working from home, trying to get a good night’s sleep, or simply seeking more peace in your living space, these proven techniques will help transform your noisy apartment into a serene sanctuary.
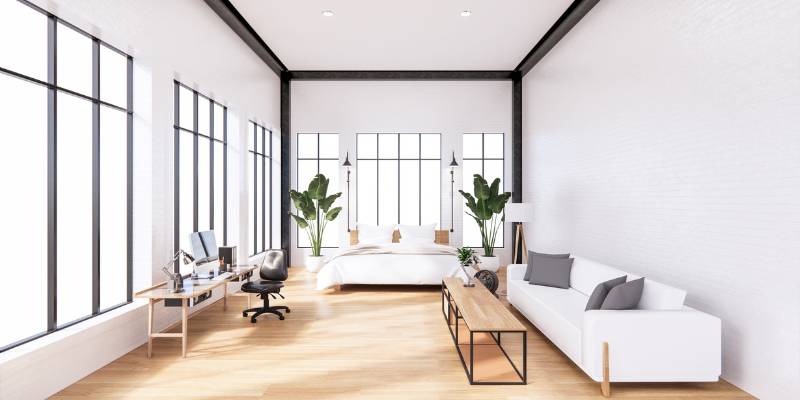
Install Soundproof Curtains
Soundproof curtains offer a non-invasive solution for reducing noise transmission through walls and windows in apartment settings.
These specialized curtains feature multiple layers of dense, sound-absorbing materials like velvet, suede, or polyester that effectively dampen both high and low-frequency sounds.
You’ll want to mount your soundproof curtains using wrap-around rods that extend 3-4 inches beyond the window or wall frame, creating an air gap that enhances sound isolation.
For maximum performance, select curtains with a weight of at least 2 pounds per square yard and guarantee they extend from ceiling to floor with a 2-inch overlap at the center when closed.
The curtains’ pleated design traps sound waves while their mass blocks vibrations, potentially reducing noise levels by 7-12 decibels when properly installed.
Strategic Bookshelf Placement

Strategically placing bookshelves against your apartment walls serves as an effective sound barrier due to the combined mass of the furniture and books.
When you position tall, sturdy bookshelves against shared walls, you’ll create an additional layer of sound-dampening density that can reduce noise transmission by up to 25%.
For maximum effectiveness, fill your shelves completely with books of varying sizes.
Hardcover books work best, as their density absorbs more sound waves.
You’ll want to guarantee the bookshelf fits snugly against the wall, leaving no air gaps that could compromise soundproofing.
Consider adding foam backing between the bookshelf and wall to enhance sound absorption.
Don’t limit yourself to standard bookshelves – modular units allow you to customize coverage based on your specific noise problem areas.
Add Acoustic Foam Panels
Three key features make acoustic foam panels an effective solution for apartment soundproofing: their pyramidal or wedge-shaped surface patterns, open-cell structure, and specialized sound-absorbing materials.
You’ll want to position these panels strategically on your walls, focusing on areas where sound transmission is most problematic.
The panels’ surface geometry creates multiple angles that diffuse sound waves, while their open-cell structure traps air molecules, converting sound energy into minimal heat through friction.
For best results, cover 15-25% of your wall surface area with panels at least 2 inches thick.
You can mount these panels using acoustic adhesive or command strips, making them ideal for rentals since they won’t damage walls.
Choose panels rated with a Noise Reduction Coefficient (NRC) of 0.80 or higher for maximum effectiveness.
Use Decorative Wall Tapestries

Wall tapestries offer a dual-purpose solution that combines aesthetic appeal with moderate sound dampening capabilities.
These thick fabric hangings create an additional barrier between your walls and sound waves, absorbing a portion of the noise that would otherwise bounce freely around your space.
For ideal soundproofing results, you’ll want to select tapestries made from dense, heavy materials like velvet, wool, or thick cotton.
Mount them approximately 2-3 inches away from the wall using horizontal rods or multiple mounting points to create an air gap, which enhances their acoustic performance.
You can maximize effectiveness by covering as much wall space as possible, focusing particularly on shared walls with noisy neighbors.
Choose tapestries with textured or woven patterns, as these irregular surfaces help diffuse sound waves more effectively than smooth fabrics.
Position Furniture Against Walls
Repositioning large furniture pieces against your walls serves as an effective, low-cost method for reducing sound transmission between apartments.
Solid wood bookcases, heavy dressers, and entertainment centers act as additional mass layers that absorb and diffuse sound waves before they enter or exit your living space.
For maximum effectiveness, you’ll want to position your heaviest furniture against shared walls where noise transmission is most problematic.
Fill bookcases completely with books, as their dense mass provides extra sound dampening.
You can also strategically place your bed’s headboard against the wall to minimize bedroom noise.
If you’re dealing with particularly thin walls, consider using felt pads between the furniture and wall to prevent vibration transfer while maintaining the sound-blocking benefits of the added mass.
Mount Mass-Loaded Vinyl Sheets
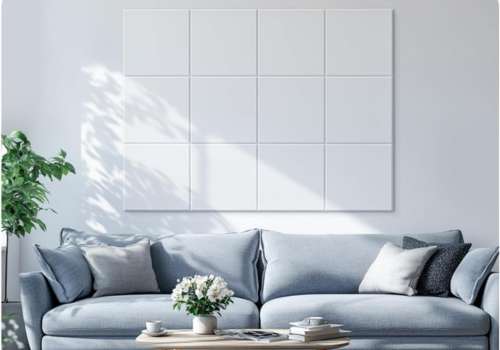
Among the most effective professional soundproofing materials, mass-loaded vinyl (MLV) sheets provide exceptional noise reduction capabilities when properly mounted to walls.
You’ll need to secure these dense, flexible barriers directly to your wall studs using appropriate screws and washers.
Before installation, measure your wall’s dimensions and cut the MLV sheets to size, leaving a small overlap at the edges.
You’ll want to create an uninterrupted barrier, sealing any gaps with acoustic caulk.
For maximum effectiveness, consider installing resilient channels between the MLV and your drywall to create an air gap, which enhances sound isolation.
While MLV installation isn’t a simple DIY project, it’s a permanent solution that’ll greatly reduce both airborne and impact noise transmission through your walls.
You’re looking at approximately 20-25 decibels of noise reduction when installed correctly.
Layer Area Rugs
While mass-loaded vinyl addresses wall transmission, sound reflection within your space requires additional treatment.
Area rugs serve as highly effective acoustic dampeners, absorbing sound waves that would otherwise bounce off hard flooring surfaces and create unwanted reverberation.
You’ll want to layer multiple rugs strategically throughout your apartment, focusing on high-traffic zones and areas near walls shared with neighbors.
Select rugs with dense pile heights of at least 1/2 inch, and opt for natural fibers like wool that offer superior sound absorption coefficients.
Adding thick rug pads underneath multiplies the acoustic benefits – choose rubber-based pads at least 1/4 inch thick.
Position larger rugs perpendicular to problem walls, extending at least 2-3 feet up adjacent surfaces for maximum sound reduction.
This multi-layered approach greatly decreases both impact noise and airborne sound transmission.
Install Door Sweep Strips
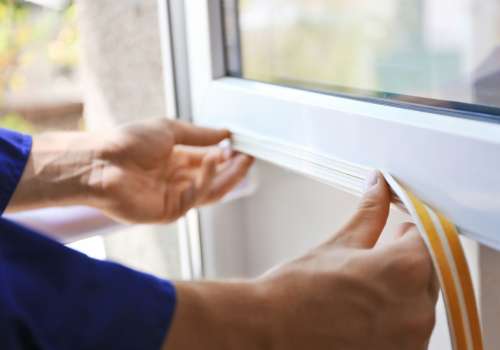
Door sweep strips represent a critical component in your apartment’s soundproofing strategy, as they seal the substantial gap between the bottom of your door and the floor – a common pathway for sound leakage.
You’ll find two primary types to choose from: adhesive-backed strips and screw-mounted sweeps.
Self-adhesive strips offer quick installation and don’t require landlord approval, while screw-mounted versions provide superior durability and sound blocking.
To enhance effectiveness, select a sweep that’s slightly wider than your door and trim it precisely to size.
For maximum noise reduction, combine your door sweep with weatherstripping along the door’s sides and top frame.
You’ll want to make certain the sweep maintains constant contact with the threshold without creating excessive drag when opening and closing the door.
Hang Canvas Art Pieces
Canvas art pieces mounted onto your walls serve as both decorative elements and effective sound absorbers, particularly for mid-range frequencies up through high-frequency reflections.
Select thick-stretched canvas pieces measuring at least 1.5 inches in depth, as these provide superior acoustic dampening properties compared to thinner alternatives.
Position multiple canvases strategically across your walls, ensuring they’re spaced 2-3 feet apart for ideal sound wave interruption.
You’ll achieve maximum effectiveness by mounting them slightly away from the wall surface, creating an air gap of approximately 1 inch.
This gap enhances the acoustic absorption by allowing sound waves to be trapped and dissipated between the canvas and wall surface.
Choose larger pieces (24×36 inches or bigger) for better low-frequency absorption, and consider adding acoustic foam backing to further improve their sound-dampening capabilities.
Add Weather Stripping
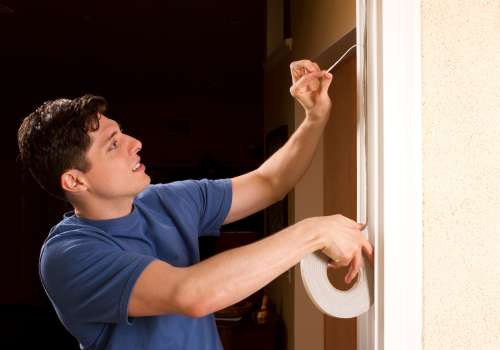
Sound leakage through gaps around doors and windows presents a significant acoustic vulnerability in apartment settings.
Weather stripping installation effectively seals these openings, reducing noise transmission by up to 50%.
You’ll need self-adhesive foam tape or rubber stripping, available at any hardware store.
Begin by thoroughly cleaning the door and window frames to guarantee proper adhesion.
Measure and cut the weather stripping to match your frame dimensions precisely.
Install the material along the entire perimeter where the door or window makes contact with its frame.
Don’t forget the bottom of doors – a door sweep attachment provides additional sound blocking.
For best results, choose high-density foam or EPDM rubber stripping with a thickness between 1/4 to 1/2 inch.
Replace the stripping annually to maintain its acoustic effectiveness.
Use White Noise Machines
White noise machines provide an effective, non-structural solution for masking unwanted ambient sounds in apartment settings.
These devices generate consistent background frequencies that help cover disruptive noises from neighbors, traffic, or outdoor activities.
You’ll find two primary types of white noise machines: digital and mechanical.
Digital units offer various sound options including pure white noise, pink noise, and nature sounds, while mechanical models use actual fans to create authentic air-movement sound.
Position your machine strategically – about 3-6 feet from your primary location for ideal coverage.
For maximum effectiveness, you’ll want to calibrate your white noise machine to a volume level slightly lower than the disturbing sounds you’re trying to mask.
This creates a sound masking effect that doesn’t compete with conversation or entertainment while effectively drowning out unwanted noise intrusion.
Cover Walls With Plants
Decorating apartment walls with living plants provides a natural and aesthetically pleasing approach to sound absorption.
Plants’ leaves, stems, and soil work together to diffuse sound waves and reduce echo through their varied surface textures and densities.
You’ll want to select plants with large, dense foliage like peace lilies, rubber plants, or philodendrons for peak sound absorption.
Install vertical garden systems or mount multiple planters at different heights to create a living sound barrier.
The soil in each planter acts as an additional acoustic dampener, while the plants themselves help regulate room humidity and purify the air.
For ideal soundproofing results, cover at least 25% of your wall surface with plants, ensuring they’re properly spaced and maintained.
You’re free to mix different species, creating a personalized urban jungle that doubles as sound insulation.
Apply Window Film
Through strategic application of acoustic window film, you can considerably reduce noise transmission from exterior sources while maintaining natural light penetration.
These specialized films consist of multiple layers of polyester and acoustic dampening materials that work to disrupt sound waves before they enter your living space.
To maximize effectiveness, select a film with a minimum thickness of 4 mils and guarantee complete coverage of your window surface.
You’ll need to thoroughly clean the glass, measure precisely, and apply the film using a squeegee to eliminate air bubbles.
The best films can reduce noise by 5-15 decibels while blocking up to 99% of UV rays.
For ideal results, combine window film with weatherstripping around window frames and consider double-layer application on particularly problematic windows.
Place Acoustic Room Dividers
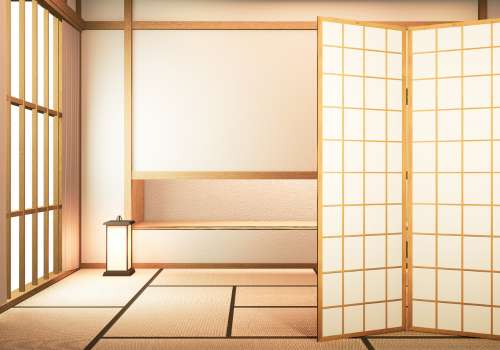
Strategic placement of acoustic room dividers offers a versatile solution for creating sound barriers within your apartment space.
These free-standing panels, typically constructed with sound-absorbing materials like polyester fiber or melamine foam, can reduce noise transmission by up to 30%.
Position the dividers perpendicular to your walls, creating a buffer zone that traps and dissipates sound waves.
You’ll want to place them at least 4-6 inches from the wall for peak performance.
Modern acoustic dividers come in various heights and configurations, allowing you to customize your soundproofing strategy without permanent modifications to your living space.
For maximum effectiveness, choose dividers with an NRC (Noise Reduction Coefficient) rating of 0.75 or higher.
You can easily reposition these barriers as your needs change, maintaining control over your acoustic environment.
Install Bass Traps
Bass traps represent a specialized acoustic solution that addresses low-frequency sound waves, which room dividers can’t effectively control.
You’ll want to position these triangular or square-shaped devices in room corners, where low-frequency sound waves typically accumulate and resonate.
For peak performance, install bass traps at the intersection points of walls and ceilings, as well as floor-to-wall joints.
You’ll find two main varieties: porous absorbers made from high-density materials like mineral wool or fiberglass, and resonant absorbers utilizing membrane or panel technologies.
While porous absorbers work best for frequencies above 100Hz, resonant traps can effectively capture frequencies as low as 50Hz.
For maximum effectiveness, combine both types in your setup, ensuring thorough low-end sound control.
Consider freestanding options if you can’t permanently modify your apartment walls.
Add Upholstered Headboards
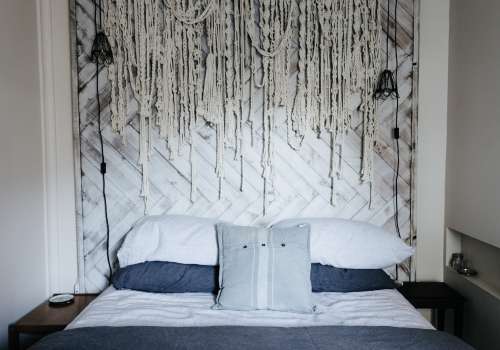
Upholstered headboards serve as both functional and aesthetically pleasing sound barriers along shared bedroom walls.
You’ll want to select a headboard with dense foam padding and heavy fabric upholstery, as these materials effectively absorb mid-range frequencies that typically pass through walls.
For maximum sound reduction, choose a floor-to-ceiling upholstered headboard panel that extends 6-12 inches beyond your bed’s width.
Install it directly against the wall using mounting brackets, ensuring there are no air gaps that could compromise its acoustic performance.
You can enhance the soundproofing further by adding a layer of mass-loaded vinyl between the wall and headboard.
This combination creates a dual-barrier system that considerably reduces sound transmission between adjoining rooms while maintaining your bedroom’s stylish appearance.
Create Cork Wall Panels
Cork wall panels offer another effective method for soundproofing shared walls while maintaining a modern, eco-friendly aesthetic.
You’ll need to install 1/2-inch thick cork panels directly onto your walls using construction adhesive or mounting brackets, ensuring complete coverage of the problematic areas.
The cellular structure of cork contains millions of tiny air pockets that effectively trap and dissipate sound waves, reducing noise transmission by up to 40%.
You can maximize the soundproofing benefits by adding a layer of mass-loaded vinyl behind the cork panels, creating a dual-barrier system.
When selecting panels, opt for high-density cork with a minimum density of 150 kg/m³ for ideal acoustic performance.
The panels’ natural thermal insulation properties will also help reduce your energy costs, making this solution both practical and cost-effective.
Seal Wall Gaps
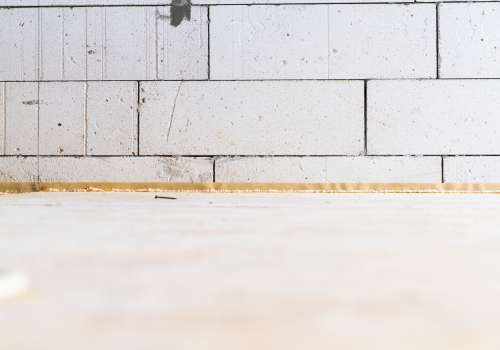
Small gaps and cracks in your walls can greatly compromise soundproofing efforts by allowing acoustic energy to pass through easily.
You’ll need to systematically locate and seal these acoustic vulnerabilities using appropriate materials.
Start by running your hand along walls to detect air movement, or use a flashlight in darkness to spot light penetration.
Apply acoustic caulk to gaps smaller than 1/4 inch, ensuring complete coverage without voids.
For larger openings up to 3/8 inch, use expanding foam sealant, but be careful not to over-apply as it can expand greatly.
Pay special attention to areas around electrical outlets, light switches, windows, and where walls meet floors or ceilings.
Once cured, these sealants create an effective acoustic barrier that prevents sound waves from finding alternative transmission paths through your walls.
Stack Storage Solutions
Creating a dense barrier between walls, strategically placed storage units can greatly enhance your apartment’s soundproofing capabilities while maximizing space utility.
Position heavy bookshelves, wardrobes, or modular storage systems against shared walls to add mass and reduce sound transmission.
You’ll achieve superior results by filling these units with dense materials like books, folded textiles, or storage boxes.
For maximum effectiveness, install rubber or foam padding beneath your storage units to prevent vibration transfer between the floor and wall.
Consider floating shelves with sound-dampening brackets to minimize direct wall contact while maintaining storage functionality.
Don’t forget to leave a small air gap between the wall and your storage solutions – this creates an additional acoustic buffer zone that helps trap and dissipate sound waves before they enter your living space.
Place Draft Stoppers
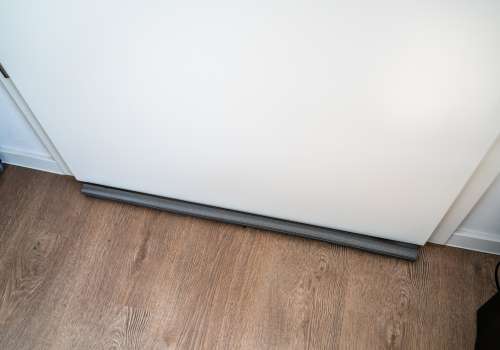
Acoustic energy readily travels through gaps beneath doors and along wall edges, making draft stoppers an essential component of any thorough soundproofing strategy.
You’ll find that placing draft stoppers at the base of your doors and along wall-floor junctions can reduce sound transmission by up to 20%.
Choose dense, multi-layer draft stoppers filled with materials like sand, microbeads, or recycled denim for peak performance.
You can install permanent door sweeps that automatically seal gaps when doors close, or opt for removable draft stoppers that you’ll slide into position as needed.
For maximum effectiveness, guarantee your draft stoppers maintain consistent contact with both the floor and the door’s bottom edge.
Don’t forget to address gaps around window frames and electrical outlets, where sound can also penetrate your living space.
Hang Moving Blankets
Moving blankets’ dense fiber construction makes them an excellent and cost-effective solution for dampening sound transmission through walls.
You’ll want to mount these blankets using heavy-duty hooks or a curtain rod system installed near the ceiling.
Position multiple blankets side by side, ensuring they overlap slightly to prevent sound leakage through gaps.
For maximum effectiveness, hang the blankets approximately 2-3 inches away from the wall surface, creating an air gap that enhances sound absorption.
You can layer multiple blankets for increased sound reduction – each additional layer typically provides 2-3 decibels of noise reduction.
Consider using furniture-moving blankets rated at 72 oz/sq yard or higher, as these provide superior sound dampening properties.
The blankets’ quilted design helps trap sound waves, reducing both impact noise and airborne sound transmission.
FAQs
How Much Will Professional Soundproofing Installation Cost for My Entire Apartment?
You’ll typically spend $1,000-$3,500 per room for professional soundproofing installation, depending on your apartment’s size and materials used. A 1,000-square-foot apartment could cost $10,000-$30,000 for complete professional treatment.
Can I Soundproof Walls Without Damaging Them or Losing My Security Deposit?
Like mounting a stealth mission, you can soundproof without damage using removable acoustic panels, mass-loaded vinyl sheets with temporary adhesive, and freestanding sound barriers. These non-permanent solutions preserve your walls and deposit.
Which Soundproofing Method Works Best Against Impact Noise From Neighbors?
You’ll get maximum impact noise reduction by installing mass-loaded vinyl barriers combined with decoupled resilient channels. This dual-layer system breaks the vibration path and absorbs low-frequency sounds from neighboring impacts effectively.
Do I Need Building Management Approval Before Installing Soundproofing Materials?
You’ll need approval for structural modifications like mounted panels or permanent fixtures. However, you’re typically free to implement non-invasive solutions like freestanding panels, furniture placement, and removable acoustic treatments without permission.
How Long Does DIY Soundproofing Typically Last Before Needing Replacement?
You’ll be amazed – properly installed DIY soundproofing can last practically forever! Most materials maintain effectiveness for 15-20 years, but your specific duration depends on material quality, installation technique, and environmental conditions you’re dealing with.
Final Thoughts
Through this extensive set of soundproofing techniques, you’ll transform your noisy apartment into an acoustically optimized sanctuary.
Like a conductor fine-tuning an orchestra, you’re now equipped to manipulate sound waves through strategic material placement and acoustic engineering principles.
Whether you’re implementing mass-loaded vinyl barriers or maximizing sound absorption through strategically positioned furnishings, these scientifically-proven methods will greatly reduce ambient noise transmission through your walls.