30 Must-Know Tips to Survive Your First Apartment Lease
While signing your first apartment lease feels like a milestone of independence, it can quickly become a maze of responsibilities and potential pitfalls.
You’ll need to navigate everything from complex legal documents to unexpected maintenance issues, and even the smallest oversight could cost you considerably.
Whether you’re a recent graduate or simply ready to leave the nest, understanding the essential aspects of apartment living will help you avoid common mistakes that plague first-time renters.
Let’s explore the critical tips that’ll transform you from a nervous newcomer into a confident tenant who knows exactly how to protect their interests and create a comfortable living space.
Read Every Word of Lease
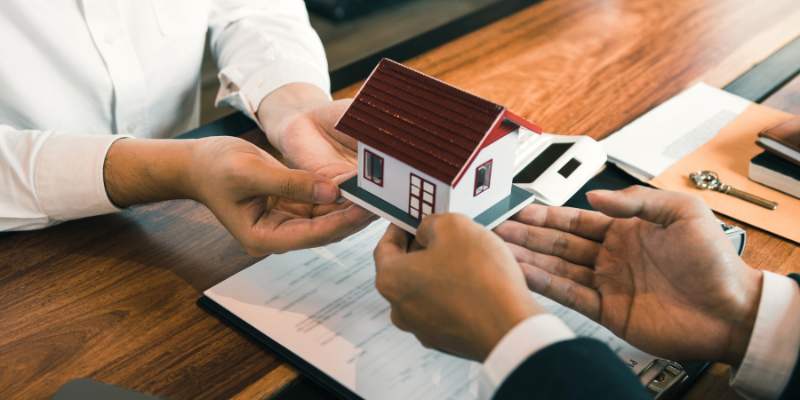
Prior to signing your first apartment lease, you’ll need to carefully review every single clause, condition, and requirement within the document.
Don’t let anyone rush you through this process, as your signature legally binds you to all terms for the duration of the lease period.
Take notes on sections you don’t understand and ask for clarification from the landlord or property manager.
Pay special attention to key provisions that affect your freedom and finances.
Look for specifics about rent payment deadlines, late fees, security deposit terms, and utility responsibilities.
Check for rules regarding guests, pets, noise restrictions, and parking arrangements. Identify maintenance obligations – both yours and the landlord’s.
Make certain you understand the procedures for maintenance requests and emergency repairs.
Review the lease termination policies, including early termination fees and notice requirements.
Look for automatic renewal clauses that might lock you into another term without your explicit consent.
Document any existing damage before moving in and verify the lease reflects any verbal agreements you’ve made with the landlord.
If something seems unfair or unclear, negotiate changes before signing – not after.
Document Existing Damage
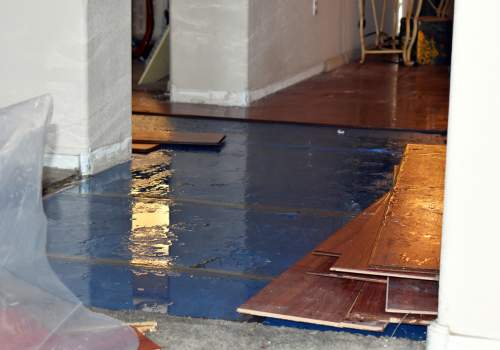
Moving into your new apartment requires a thorough inspection and documentation of any existing damage before you unpack a single box.
Take detailed photos and videos of every room, focusing on walls, floors, appliances, fixtures, and any visible imperfections.
Don’t forget often-overlooked areas like inside cabinets, behind doors, and along baseboards.
Create an extensive damage report that includes the date, specific locations, and descriptions of each issue you find.
Note everything from minor scuffs to major problems like water stains or broken fixtures.
Your property manager should provide a move-in inspection form – fill it out meticulously and keep a copy for yourself.
Email these photos, videos, and your detailed report to your landlord or property manager immediately, creating a timestamped record of the unit’s condition.
This documentation protects you from being charged for pre-existing damage when you move out.
If your landlord promises to fix any issues, get it in writing with specific completion dates.
Store all these records in both digital and physical formats – you’ll need them to protect your security deposit when your lease ends.
Calculate Total Monthly Costs
Understanding your true monthly expenses goes far beyond just the base rent amount.
You’ll need to factor in utilities like electricity, gas, water, internet, and trash collection – costs that can vary greatly by season and location.
Don’t forget renter’s insurance, which most landlords require and protects your belongings.
Consider parking fees, whether they’re included or require an additional monthly permit.
If you’re in a secured building, you might need to pay for key fobs or garage door openers.
Many properties also charge monthly pet rent and maintenance fees if you have furry companions.
Create a detailed spreadsheet that includes these fixed costs along with variable expenses like groceries, transportation, and entertainment.
Add a buffer of 10% for unexpected expenses or utility spikes.
If you’re splitting costs with roommates, clearly outline who’s responsible for which payments and set up a system for tracking shared expenses.
Remember to account for one-time move-in costs like security deposits, application fees, and moving expenses.
These upfront payments can impact your initial budget greatly and should influence your choice of apartment.
Research Rental Insurance Options

Securing adequate rental insurance should rank high on your priority list before signing a lease.
While your landlord’s insurance covers the building structure, it won’t protect your personal belongings or shield you from liability claims.
Don’t make the mistake of assuming you’re covered.
Start by comparing quotes from multiple insurance providers.
Most basic rental insurance policies cost between $15-30 monthly and typically cover three essential areas: personal property protection, liability coverage, and additional living expenses.
You’ll want enough coverage to replace all your belongings if disaster strikes.
Consider these key factors when selecting a policy: coverage limits for electronics and valuables, deductible amounts, flood or earthquake protection, and whether the policy offers actual cash value or replacement cost coverage.
Make sure you understand what events are covered – theft, fire, water damage, or vandalism.
Document everything you own by taking photos and keeping receipts. Create a detailed inventory of your possessions with estimated values.
This documentation will prove invaluable if you ever need to file a claim.
Once you’ve chosen a policy, keep digital copies of all insurance documents in a secure location.
Schedule Move-In Inspection
Before you collect your new apartment keys, scheduling a thorough move-in inspection with your landlord or property manager is absolutely vital.
This inspection serves as your protection against future disputes over damage charges when you eventually move out.
During the inspection, document every detail about your unit’s condition.
Take clear, dated photos of existing damage, including scratches, dents, stains, or malfunctioning appliances.
Don’t overlook walls, floors, windows, light fixtures, and plumbing fixtures.
Test every outlet, switch, and appliance to verify they’re working properly.
Complete the property’s official inspection form methodically, noting even minor imperfections.
Request a copy of this signed document for your records, and email your photos to your landlord immediately after the inspection.
If you spot issues requiring maintenance, get written confirmation of when they’ll be addressed.
Don’t rush this process – a thorough inspection typically takes 45-60 minutes.
Set Up Utilities Early
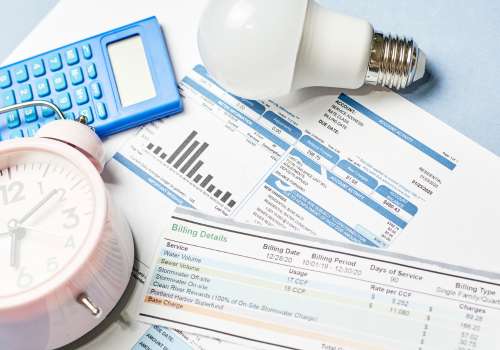
The clock starts ticking on utility setup weeks before your move-in date.
Contact your landlord immediately to confirm which utilities you’re responsible for and obtain a list of local service providers.
Typically, you’ll need to arrange electricity, gas, water, internet, and waste collection services.
Schedule utility activation at least two weeks in advance to avoid delays or connection fees.
Many providers require a deposit or credit check for new customers, so factor these costs into your moving budget.
Don’t forget to document all setup confirmations and keep records of your account numbers.
Create a utilities checklist that includes:
- Account setup dates
- Service activation dates
- Deposit amounts
- Monthly due dates
- Emergency contact numbers
- Online account login credentials
If you’re moving during peak season (summer months), schedule even earlier as providers get booked quickly.
Some utilities require in-person activation, so coordinate these appointments with your move-in schedule.
Remember to transfer or cancel services at your previous residence to avoid double billing.
Set up autopay for essential utilities to prevent service interruptions, but review monthly statements carefully for accuracy.
Know Your Security Deposit Rules
With every rental agreement, your security deposit represents a significant upfront investment that requires careful attention to detail.
Your landlord must provide written documentation outlining specific conditions for receiving your full deposit back when you move out.
Review these terms carefully and keep a copy for your records.
Document your apartment’s condition thoroughly before moving in.
Take date-stamped photos of every room, noting existing damage or wear.
Email these to your landlord and keep copies – they’ll protect you from unfair deductions later.
You’ll want evidence of the unit’s original state when it’s time to move out.
Make sure you understand your state’s security deposit laws, which regulate maximum deposit amounts and return timeframes.
Most states require landlords to return deposits within 14-60 days after move-out, along with an itemized list of any deductions.
Don’t let your landlord hold onto your money longer than legally allowed.
Before moving out, schedule a walk-through inspection with your landlord. Clean thoroughly, repair any damage, and return all keys.
Request your deposit return in writing, including your new address for the refund check.
Meet Your Property Manager

Building a positive relationship with your property manager goes beyond just signing paperwork and paying rent.
You’ll want to establish clear communication channels from day one, including their preferred contact methods and emergency phone numbers.
Don’t hesitate to ask about their office hours, response times, and maintenance request procedures.
Take the initiative to introduce yourself properly during the move-in inspection.
This face-to-face interaction helps establish rapport and shows you’re a responsible tenant who takes the lease seriously.
During this meeting, address any immediate concerns about the property and clarify any lease terms you’re unsure about.
Keep detailed records of all your interactions, including dates, times, and the nature of your conversations.
If you’re making maintenance requests or reporting issues, follow up with an email to create a paper trail.
Remember, your property manager isn’t just a rent collector – they’re your primary point of contact for everything from repairs to lease renewals.
Be professional but assertive when dealing with problems.
If you encounter issues, present them clearly and offer reasonable solutions when possible.
This approach helps build mutual respect and can make your tenancy notably smoother.
Learn Emergency Maintenance Procedures
Plumbing disasters and power outages don’t wait for convenient hours, so you’ll need to master your building’s emergency maintenance procedures before crisis strikes.
Start by saving your property manager’s emergency contact number in your phone and keeping a printed copy on your fridge.
Learn which situations qualify as emergencies: flooding, gas leaks, complete power loss, or heating/cooling failures in extreme weather.
Document your building’s specific protocols for after-hours emergencies.
Some properties use 24-hour maintenance hotlines, while others require you to contact specific vendors.
You’ll want to locate your unit’s main water shutoff valve, circuit breaker box, and gas shutoff valve now – not when water’s spewing everywhere.
Create an emergency kit with basic tools: flashlights, batteries, plunger, basic wrench set, and battery-powered phone charger.
Keep digital copies of your lease agreement and insurance documents readily accessible.
If you’re responsible for any utility accounts, store those emergency numbers too.
Remember that non-emergency maintenance requests submitted after hours may incur extra charges, so distinguish between true emergencies and issues that can wait until morning.
Create Roommate Agreement Terms
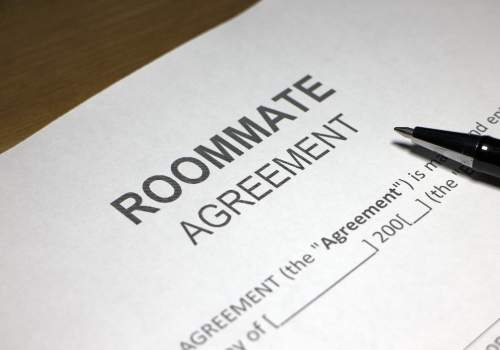
While emergency protocols protect you from building disasters, a solid roommate agreement safeguards you from potential household conflicts.
Your agreement should outline specific expectations and responsibilities that each roommate must follow during your lease term.
Start by documenting financial obligations, including rent payment schedules, utility bill splits, and shared grocery arrangements.
Establish clear rules for handling late payments and unexpected expenses.
Define cleaning responsibilities by creating a rotation schedule for common areas and establishing standards for kitchen, bathroom, and living room maintenance.
Address lifestyle considerations by setting quiet hours, guest policies, and overnight visitor limitations.
You’ll need to agree on shared space usage, including parking spots, storage areas, and common room scheduling.
Don’t forget to establish protocols for temperature control, security measures, and shared appliance use.
Detail conflict resolution procedures and consequences for agreement violations.
Put everything in writing and have all roommates sign and date the document.
Keep copies for each person and review the terms quarterly to make adjustments as needed.
Master Rental Payment Methods
Staying on top of your monthly rent payments requires understanding the various payment methods accepted by your landlord.
Most property managers offer multiple options, and you’ll want to choose the one that best fits your financial habits and lifestyle.
Direct deposit and online payment portals have become the preferred methods for many tenants, offering automatic scheduling and digital receipts.
You’ll typically need to link your checking account or credit card to set up these systems.
Some landlords use property management apps like Venmo, PayPal, or Zelle, which can streamline the process even further.
If you prefer traditional methods, personal checks remain widely accepted, though you’ll need to factor in mail delivery time or drop-off logistics.
Money orders and cashier’s checks provide secure alternatives but require an extra step of obtaining them from your bank or post office.
Some landlords still accept cash, but always insist on a receipt for proof of payment.
Whatever method you choose, set payment reminders and maintain a dedicated rent fund in your account.
Consider scheduling your payments a few days before the due date to avoid any processing delays or late fees.
Plan Your Space Layout

A thoughtful space layout can transform your apartment from a basic living area into a functional and comfortable home.
Begin by measuring each room and creating a digital or hand-drawn floor plan to scale.
Don’t forget to mark window locations, electrical outlets, and permanent fixtures that’ll impact your furniture placement.
Consider your daily routines when mapping out zones within each room.
You’ll want clear pathways between high-traffic areas and at least 30 inches of walking space around furniture.
Position your bed away from windows to avoid drafts, and arrange your workspace where you’ll get ideal natural light.
In the living room, create a focal point – typically the TV or a window – and arrange seating to facilitate conversation.
Multi-functional furniture is your ally in small spaces.
Choose expandable dining tables, storage ottomans, or murphy beds to maximize square footage.
Keep furniture proportional to your room size – oversized pieces can overwhelm small spaces.
Don’t block air vents or radiators with furniture, and make certain fire exits remain accessible.
Remember to leave room for storage solutions like bookcases or coat hooks, which you’ll need for organizing your belongings.
Check Building Safety Features
Beyond planning your layout, ensuring your safety in your new apartment requires a thorough understanding of the building’s security features.
You’ll need to verify that all external doors have working locks, including windows and any sliding glass doors.
Check for functional smoke detectors and carbon monoxide alarms in appropriate locations, and confirm their batteries work.
Locate all emergency exits and make sure you can access them without obstruction.
You’ll want to identify the closest fire escape or emergency stairwell from your unit.
Test the door peephole if you have one, and consider installing a security camera if permitted. Don’t forget to verify that all hallway and exterior lighting functions properly.
Ask your landlord about the building’s security protocols, including visitor policies and package delivery procedures.
Find out if there’s an on-site security team or surveillance system.
You should also familiarize yourself with the building’s emergency response plan and keep important contact numbers readily available.
If you notice any safety concerns, document them with photos and report them to management immediately.
Understand Guest Policies

Most landlords maintain specific rules about overnight guests and extended stays, which you’ll need to understand before inviting friends or family to visit.
Your lease agreement typically specifies how many consecutive nights a guest can stay, often ranging from 7-14 days.
Exceeding these limits could result in lease violations and additional charges.
Pay attention to restrictions on the number of guests allowed at one time.
Some properties limit occupancy for safety reasons and to prevent unauthorized subletting.
You’ll want to review policies about using common areas with guests, such as pools, gyms, or parking spaces.
Many buildings require visitors to register at the front desk or obtain temporary parking permits.
Don’t assume you can let someone crash on your couch indefinitely.
If you’re planning to host someone for an extended period, contact your landlord first to discuss options.
Some may require guests to undergo background checks or be added to the lease.
Breaking guest policies can lead to fines, eviction notices, or legal troubles.
Remember, these rules exist to protect both residents and property owners, so it’s essential to follow them while maintaining your social life.
Learn Parking Rules
Understanding parking regulations before moving in can save you significant hassle and expense down the road.
Review your lease agreement carefully to identify designated parking spots, guest parking areas, and any restrictions on vehicle types or sizes.
Many complexes require parking permits or stickers, and you’ll need to know how to obtain them.
Don’t assume you’re entitled to multiple spots – most properties limit the number of vehicles per unit.
Ask about overnight guest parking policies and whether you’ll need temporary passes.
If you’re in a city, find out if street parking is available as a backup option and whether you’ll need a residential permit.
Be clear on towing policies. Many complexes contract with towing companies that regularly patrol the property.
Know which areas are strictly off-limits, such as fire lanes, loading zones, or reserved spaces.
You’ll also want to understand snow removal procedures if you live in a cold climate – some properties require you to move your vehicle during plowing.
Keep documentation of your parking rights handy, including permit numbers and assigned spot information, in case disputes arise with neighbors or management.
Review Pet Policies

Even if you don’t currently own a pet, carefully reviewing your apartment’s pet policies is essential before signing the lease.
These policies can greatly impact your living situation and future pet ownership options.
Pay attention to size restrictions, breed limitations, and the number of pets allowed per unit.
Look beyond the basic “pets allowed” statement and examine the specific requirements.
Many properties charge additional pet rent, require non-refundable pet deposits, or mandate pet insurance.
You’ll need to factor these costs into your monthly budget.
Some complexes also require pet interviews, vaccination records, or DNA testing for dogs.
Don’t assume you can bend the rules later. Unauthorized pets often lead to lease violations, fines, or even eviction.
If you’re planning to get a pet in the future, confirm whether you’ll need to submit a new application or pay additional fees.
Watch for clauses about visiting pets, as some properties restrict even temporary animal guests.
Also, check if the complex designates specific areas for pet relief and whether they provide amenities like dog washing stations or waste disposal stations.
Understanding these policies now helps you avoid conflicts later.
Keep Communication Records
Maintaining detailed records of all communications with your landlord or property manager serves as essential protection throughout your tenancy.
Create a dedicated folder, either digital or physical, to store every interaction, including emails, text messages, written notices, and maintenance requests.
Take photos or scan all paper documents immediately upon receipt.
Document face-to-face conversations and phone calls by sending follow-up emails summarizing what was discussed.
Write something like, “As we discussed on [date], you agreed to repair the dishwasher by [date].”
This creates a paper trail and confirms both parties’ understanding of the conversation.
Save rent payment receipts, canceled checks, or electronic payment confirmations.
When submitting maintenance requests, include dates, descriptions, and photos of the issues.
If you receive notices about lease violations or upcoming inspections, maintain copies and note how and when you received them.
These records protect you during disputes, support your case if legal issues arise, and help you recover your security deposit.
They’ll also prove invaluable when documenting the apartment’s condition during move-in and move-out inspections.
Know Your Maintenance Responsibilities
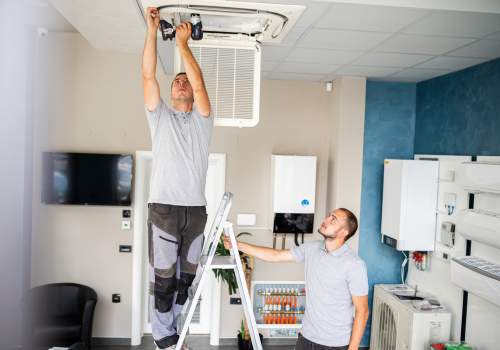
Sorting out your maintenance responsibilities can prevent costly disputes with your landlord.
Review your lease carefully to understand which maintenance tasks fall under your domain versus your landlord’s obligations.
Typically, you’re responsible for basic upkeep like changing light bulbs, replacing batteries in smoke detectors, and keeping the apartment clean and sanitary.
You’ll need to handle minor repairs that result from your daily use, such as unclogging drains or fixing drawer handles you’ve loosened.
Your landlord generally covers major systems and structural elements, including plumbing, electrical, heating/cooling systems, and roof repairs.
However, if you cause significant damage, you’ll likely foot the bill for repairs.
Don’t attempt DIY fixes on major systems – this could void your lease and create liability issues.
Instead, report serious maintenance problems to your landlord immediately through proper channels.
Create a maintenance checklist for your responsibilities and stick to a regular schedule.
When in doubt about a specific maintenance task, consult your lease or ask your landlord for clarification.
Understand Noise Regulations
Noise complaints can quickly sour relationships with neighbors and lead to lease violations.
Most apartment complexes enforce “quiet hours,” typically from 10 PM to 8 AM, when you’ll need to minimize noise from music, TV, and social gatherings.
You’ll want to review your lease agreement carefully, as it’ll outline specific noise restrictions and consequences for violations.
To protect yourself, familiarize yourself with your city’s noise ordinances, which may differ from your building’s rules.
Many municipalities use the “plainly audible” standard – if your neighbor can clearly hear your noise from their unit, you’re likely in violation.
Keep your bass levels low, as deep sounds travel easily through walls and floors.
When hosting gatherings, inform your neighbors in advance and provide them with your contact information.
Consider investing in area rugs to muffle footsteps, and position speakers away from shared walls.
If you’re dealing with noisy neighbors, document incidents with dates, times, and recordings before escalating to management.
Save For Unexpected Expenses

Every first-time renter should maintain an emergency fund of at least three months’ worth of expenses to handle unexpected costs.
This fund should cover your rent, utilities, groceries, and transportation expenses in case you lose your job or face a medical emergency.
Don’t wait until you’re in a tough spot – start building this safety net immediately.
Beyond your emergency fund, set aside money for specific rental-related surprises.
Your security deposit won’t cover everything, and you’ll need to be prepared for expenses like replacing a broken microwave, fixing a clogged drain, or dealing with pest control issues that fall under tenant responsibilities.
You might also face unexpected rent increases, higher utility bills during extreme weather, or the need to replace furniture.
Create a dedicated savings account for these rental expenses and automatically transfer 5-10% of your monthly income into it.
If you’re splitting costs with roommates, consider setting up a shared expense account where everyone contributes monthly.
This proactive approach will help you maintain your independence and avoid the stress of scrambling for funds when unexpected situations arise.
Study Lease Termination Rules
Understanding your lease’s termination rules is essential before you sign any rental agreement.
Carefully review the conditions that allow you to end your lease early, including notice periods, penalties, and specific documentation requirements.
Most leases require 30-60 days’ written notice, even if you’re planning to leave when your lease naturally expires.
Pay close attention to break-lease clauses and associated fees.
You’ll typically need to pay one to three months’ rent as a penalty for early termination.
Some leases offer buyout options, letting you pay a predetermined amount to exit the agreement.
Document these costs and factor them into your decision-making process.
Look for provisions about subletting or lease transfers, which could provide alternatives to breaking your lease.
Also, understand your rights regarding early termination due to military deployment, domestic violence, or uninhabitable conditions – situations where you might legally end your lease without penalties.
Keep copies of all lease-related documents and communication with your landlord.
If you need to terminate early, send written notice via certified mail to create a paper trail and protect your interests during the process.
Check Appliance Operation
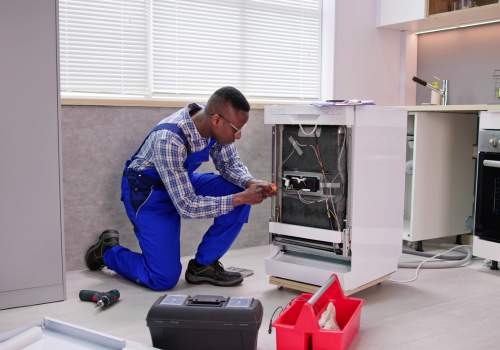
Before signing your lease or moving in, testing every appliance’s functionality can prevent future disputes about pre-existing issues.
Document each test with photos or videos, and don’t hesitate to turn every knob, switch, and button while the property manager is present.
Start with the major appliances: test all burners on the stove, run the dishwasher through a complete cycle, and check the refrigerator’s temperature settings.
Run the washing machine and dryer, noting any unusual sounds or vibrations.
Don’t forget to verify the water heater’s performance by running hot water in multiple locations.
Test the HVAC system in both heating and cooling modes, even if you’re moving in during a single-season climate.
Check every electrical outlet using a simple outlet tester, and confirm the garbage disposal, microwave, and any built-in appliances work properly.
If you spot any issues, get them in writing and confirm they’re noted in your lease agreement.
Compile a detailed report of your findings, including the test date and specific problems.
This documentation will protect you from being charged for pre-existing issues when you eventually move out.
Organize Important Documents
With your new lease signed, organizing and safeguarding your rental documents becomes a critical priority.
Create a dedicated folder, either physical or digital, to store all essential paperwork related to your apartment.
Include your signed lease agreement, security deposit receipt, move-in inspection report, and rental insurance policy.
Keep records of all communication with your landlord, including maintenance requests, repair confirmations, and any agreements made via email or text.
Take photos of the apartment’s condition before moving in, and store these images alongside your documentation.
Save monthly rent payment receipts and utility bills to track your expenses and prove timely payments.
You’ll also want to maintain current copies of your renter’s insurance declarations page, emergency contact information, and property management’s policies.
If you’re sharing the apartment, store copies of your roommate agreement and shared expense records.
Consider scanning all physical documents and backing them up to a secure cloud storage service, ensuring you can access them anywhere.
When you need to reference a specific document or resolve a dispute, you’ll thank yourself for maintaining an organized system.
Know Your Rights

Beyond keeping your documents organized, you’ll need to familiarize yourself with your legal protections as a tenant.
Your state and local laws outline specific rights regarding security deposits, maintenance responsibilities, privacy, and eviction procedures.
Research your area’s tenant rights through government websites or legal aid organizations to comprehend these protections fully.
You’re entitled to a habitable living space, which means your landlord must maintain essential services like heating, plumbing, and electricity.
If repairs are needed, you have the right to request maintenance within reasonable timeframes.
Your landlord must also provide advance notice before entering your unit, typically 24-48 hours, except in emergencies.
Don’t let anyone violate your rights due to inexperience.
You can’t be discriminated against based on race, religion, gender, or other protected characteristics.
Your landlord can’t retaliate against you for exercising your legal rights, such as reporting code violations.
If you face issues, document everything and know where to file complaints – whether with local housing authorities or fair housing organizations.
Understanding these rights empowers you to stand firm when necessary and guarantees you’re treated fairly throughout your tenancy.
Test Smoke Detectors
Testing smoke detectors regularly is a critical safety practice that many first-time renters overlook.
You’ll need to test each detector in your apartment monthly and replace the batteries at least once a year.
Don’t wait for that annoying chirp to signal a low battery – mark your calendar and stay proactive.
To test your smoke detector properly, press and hold the test button until you hear the alarm sound.
If it’s weak or doesn’t sound at all, replace the batteries immediately.
For hardwired detectors, verify they’re still beeping even when you cut the power – this confirms the backup battery works.
You’ll also want to check the manufacture date on each detector; they typically need replacement every 10 years.
If your landlord hasn’t provided adequate smoke detection, you’ve got the right to request it.
Most states require landlords to install working smoke detectors in specific locations throughout the unit.
Document your maintenance efforts and any communication with your landlord about detector issues.
This documentation can protect you legally and, more importantly, verify you’re maintaining a safe living environment.
Report Issues Promptly

Just as regular smoke detector maintenance helps prevent emergencies, promptly reporting issues to your landlord prevents small problems from becoming major catastrophes.
When you notice water leaks, electrical issues, pest problems, or structural concerns, document them immediately through your landlord’s preferred communication method, whether that’s an online portal, email, or phone call.
Take photos of the issue, note the date and time you discovered it, and keep records of all communications with your landlord.
You’ll want a clear paper trail showing you’ve fulfilled your responsibility to report problems.
If your landlord provides a maintenance request form, fill it out completely and save a copy for your records.
Don’t wait to report issues, even if they seem minor.
That small water stain on your ceiling could indicate a leaking pipe that might eventually collapse your drywall.
A few ants could signal an impending infestation.
By reporting problems quickly, you’re protecting yourself from potential liability and ensuring your living space remains safe and comfortable.
Follow Garbage Disposal Rules
Proper garbage disposal practices can make the difference between a well-maintained apartment and one plagued with problems.
You’ll need to learn your building’s specific rules about trash collection days, recycling requirements, and proper disposal locations to avoid fines or conflicts with management.
Break down all cardboard boxes before disposal, and don’t leave trash bags in hallways or common areas.
You’ll want to wrap food waste securely to prevent odors and pest issues.
If your building has a compactor or chute system, don’t force oversized items down it – take them to the designated bulk disposal area instead.
For recycling, rinse containers thoroughly and separate materials according to local requirements.
Many apartments have specific bins for paper, glass, and plastics.
You’re responsible for knowing what can and can’t be recycled in your area.
Hazardous materials like batteries, electronics, and paint require special disposal methods – never throw these in regular trash.
If you’re unsure about any disposal rules, check your lease agreement or ask your property manager.
Following these guidelines won’t just keep you in compliance; it’ll help maintain a clean living environment for everyone in your building.
Review Subletting Guidelines
Beyond maintaining a clean living space, you’ll need to understand your building’s subletting policies before considering temporary tenants.
Most leases require written permission from your landlord before you can sublet your apartment, and violating this requirement could result in eviction or legal issues.
Start by reviewing your lease agreement‘s specific subletting clauses.
Look for details about application processes, additional fees, and whether subletting is prohibited entirely.
If subletting is allowed, you’ll typically need to submit your potential subtenant’s information, including their employment details, credit history, and references.
Don’t forget to create a formal sublease agreement that outlines rent payments, security deposits, utilities, and duration of stay.
You’ll remain legally responsible for rent payments and property damage even with a subtenant, so choose carefully.
Document the apartment’s condition before your subtenant moves in, just as your landlord did with you.
Consider timing restrictions – many buildings limit subletting to specific minimum or maximum periods.
Some may only permit summer sublets or require subtenants to undergo the same screening process as primary tenants.
Always get everything in writing to protect yourself from potential disputes.
Learn Common Area Rules
Every apartment building has specific rules governing the use of shared spaces like lobbies, laundry rooms, and outdoor areas.
You’ll need to familiarize yourself with these regulations to avoid conflicts with neighbors and potential fines from management.
Common areas often have posted hours of operation, noise restrictions, and specific guidelines about guest access.
Pay attention to parking regulations in shared lots, including visitor spaces and assigned spots.
You’ll want to know if there are designated areas for bike storage, package delivery, or pet relief stations.
Many buildings restrict certain activities in common areas, such as smoking, grilling, or hosting gatherings without prior approval.
Your lease should outline rules about decorating shared spaces, maintaining cleanliness in laundry facilities, and proper disposal of trash and recycling.
Don’t assume you can move furniture into common areas or post notices on community bulletin boards without permission.
Most buildings have strict policies about these actions.
If you’re unsure about any common area rules, ask your property manager for clarification – it’s better to know the boundaries upfront than face penalties later.
Understand Renewal Terms

While understanding common area rules helps you navigate shared spaces, knowing your lease renewal terms is equally important for your long-term housing plans.
Your lease agreement should specify whether it automatically converts to month-to-month after expiration or requires a new fixed-term agreement.
Pay attention to the notice period required – typically 30 to 60 days – before your lease ends.
Don’t assume you’ll keep the same rental rate.
Many landlords increase rent during renewal, and they must provide written notice of any changes.
You’ll want to review your current market’s rental rates to determine if the new terms align with local prices.
Mark your calendar with important dates, including when you need to notify your landlord about your intentions to stay or leave.
If you’re planning to move out, you’ll need to provide written notice within the specified timeframe.
Missing these deadlines could result in automatic renewal or loss of your security deposit.
You can also negotiate renewal terms, especially if you’ve been a reliable tenant.
Consider requesting improvements or maintaining your current rate in exchange for signing a longer lease term.
FAQs
How Do I Handle Conflicts With Noisy Neighbors Above My Apartment?
First, talk directly with your neighbors about noise concerns. If that doesn’t work, document incidents and contact your landlord. As a last resort, you can file a noise complaint with local authorities.
What Items Should I Absolutely Not Buy Used for My First Apartment?
Like your toothbrush, some items deserve a fresh start. Don’t buy used mattresses, pillows, upholstered furniture, or kitchen appliances. You’ll want these items new to avoid bedbugs, bacteria, and hidden damages.
When Is the Best Time of Year to Start Apartment Hunting?
You’ll find the best deals from October to April when rental demand is lower. Summer months bring higher prices and competition, so start looking 60 days before your target move-in date during off-peak seasons.
How Do I Prevent Mold Growth in Bathroom and Kitchen Areas?
You’ll prevent mold growth by using exhaust fans, wiping surfaces dry, fixing leaks promptly, and maintaining proper ventilation. Keep humidity below 60% by running a dehumidifier and leaving bathroom doors open after showers.
What’s the Proper Way to Hang Pictures Without Damaging Apartment Walls?
As light as a feather, command strips are your wall’s best friend. You’ll want to clean surfaces first, follow weight limits, and use multiple strips for larger frames to guarantee damage-free hanging.
Final Thoughts
Living in your first apartment doesn’t have to be overwhelming, but what happens next depends entirely on your preparation.
You’ll face unexpected challenges, from noisy neighbors to maintenance emergencies, yet armed with these essential tips, you’re ready to tackle them head-on.
By staying organized, maintaining clear communication, and following your lease guidelines, you’re not just surviving your first apartment – you’re mastering the art of independent living.