21 Ways to Make Your Showerhead Sparkle Like New (Game-Changer #15!)
You’ve probably noticed your showerhead isn’t performing like it used to, with weak water pressure and unsightly mineral buildup stealing your morning shower’s glory.
While there are numerous ways to restore your showerhead’s shine and functionality, not all methods deliver the same results.
From simple vinegar soaks to surprisingly effective cola treatments, we’ll explore the most powerful cleaning techniques that professionals swear by.
Before you consider replacing your showerhead, you’ll want to discover these proven solutions—especially method #15, which has transformed countless bathrooms with minimal effort and remarkable results.

Vinegar Soak Method
The vinegar soak method stands as the most effective DIY solution for removing stubborn mineral deposits from your showerhead.
Fill a plastic bag with white vinegar, then secure it around your showerhead using a rubber band or twist tie.
Make sure the spray holes are fully submerged in the vinegar solution.
Let it soak for 6-8 hours, or overnight if you’re dealing with severe buildup.
You’ll notice the vinegar breaking down calcium, lime, and other mineral deposits that have been restricting your water flow.
Once the time’s up, remove the bag and run hot water through your showerhead for 2 minutes to flush out any loosened debris.
For extra cleaning power, use an old toothbrush to scrub the nozzles gently.
You’re now free from reduced water pressure and unsightly mineral buildup.
Baking Soda Deep Clean
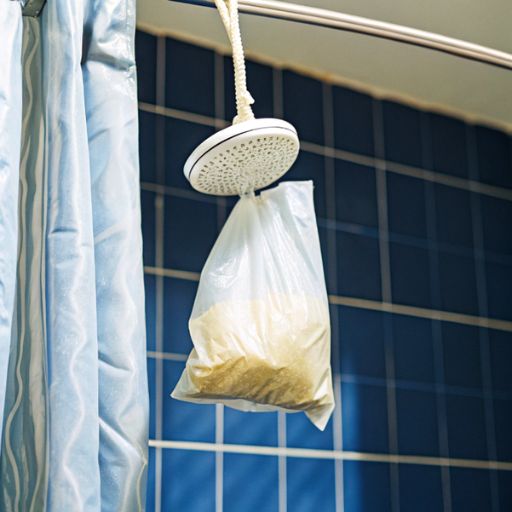
While vinegar alone works wonders, combining it with baking soda creates an even more powerful cleaning solution for your showerhead.
Mix 1/3 cup baking soda with 1 cup white vinegar in a large plastic bag.
You’ll notice an immediate fizzing reaction that helps break down stubborn mineral deposits and grime.
Secure the bag around your showerhead using a rubber band, making sure it’s completely submerged in the solution.
Let it sit for 2-3 hours, or overnight for severely clogged heads.
For an extra boost, gently scrub the nozzles with an old toothbrush before removing the bag.
Once you’re done, run hot water through the showerhead for 2 minutes to flush out any remaining debris.
You’ll immediately notice stronger water pressure and a cleaner spray pattern.
Lemon Juice Quick Fix
Fresh lemon juice offers a fast-acting natural alternative to vinegar for cleaning your showerhead.
Cut a lemon in half and rub it directly against the nozzles, squeezing gently to release the acidic juice.
You’ll notice the citric acid immediately starting to break down mineral deposits and hard water stains.
For stubborn buildup, create a lemon juice paste by mixing equal parts fresh lemon juice and salt.
Apply this mixture to your showerhead’s surface and let it sit for 15 minutes.
The salt’s abrasive texture combined with lemon’s natural cleaning properties will dissolve calcium deposits without damaging the finish.
Wipe clean with a damp microfiber cloth, then run hot water through the showerhead for 30 seconds to flush out any remaining residue and lemon pulp.
Cola Bath Treatment
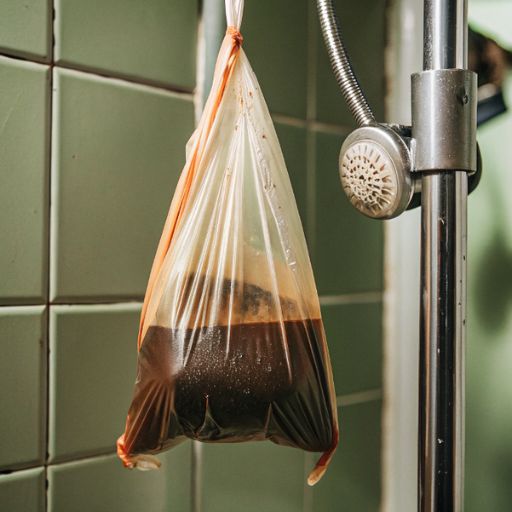
Inside your pantry lies an unexpected cleaning solution: carbonated cola.
The phosphoric acid and carbonic acid in cola work together to dissolve mineral deposits and limescale that clog your showerhead’s spray holes.
Pour cola into a plastic bag until it’s about half full, then secure the bag around your showerhead with a rubber band.
Make sure the nozzles are completely submerged in the liquid.
Let it soak for 30-60 minutes, depending on buildup severity. For stubborn deposits, you can leave it overnight.
Remove the bag and run hot water through the showerhead for 2-3 minutes to flush out loosened debris and remaining cola.
You’ll notice immediately improved water flow and spray pattern.
It’s best to use regular cola, not diet, as the real sugar helps enhance the cleaning action.
Citric Acid Power Scrub
Another natural descaling powerhouse, citric acid offers a potent alternative to cola-based cleaning.
To harness its cleaning power, mix 3 tablespoons of citric acid powder with 2 cups of warm water in a spray bottle.
You’ll want to remove your showerhead first – just unscrew it counterclockwise while holding the shower arm steady.
Spray the solution generously over your showerhead’s surface and nozzles, letting it sit for 30 minutes. For stubborn mineral deposits, use an old toothbrush to scrub in circular motions.
Don’t forget to target the pivot ball and threading. Once you’ve cleared away the buildup, rinse thoroughly with hot water and reattach the showerhead.
You’ll notice immediately improved water flow and a shine that rivals a new fixture.
Bleach Sanitizing Solution
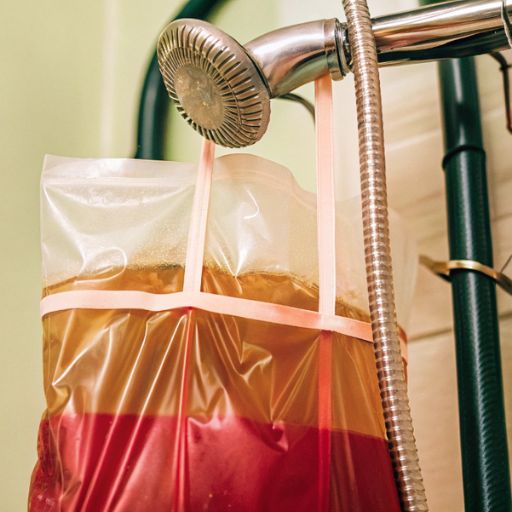
Periodic sanitization with bleach guarantees your showerhead stays free from harmful bacteria and mold.
Mix one part bleach with four parts water in a plastic bag, then secure it around your showerhead using a rubber band.
You’ll want to completely submerge the nozzles in the solution.
Let the mixture work for 30 minutes, but don’t exceed this time as bleach can damage metal finishes.
Once you’ve removed the bag, run hot water through the showerhead for two minutes to flush out any remaining bleach solution.
You’re now free from 99.9% of bacteria that could affect your family’s health.
For enhanced results, scrub the nozzles with an old toothbrush after the bleach treatment.
Repeat this process every three months to maintain ideal cleanliness and water flow.
Dryer Sheet Hack
While commercial cleaners work well, a simple dryer sheet offers a surprisingly effective way to remove stubborn mineral deposits from your showerhead.
Simply wrap a new or used dryer sheet around your showerhead, securing it with a rubber band.
Let it sit for 1-2 hours while the fabric softener chemicals break down the calcium and mineral buildup.
You’ll find that the antistatic properties in the dryer sheet help prevent future mineral accumulation, giving you longer-lasting results.
After treatment, remove the sheet and run hot water through the showerhead for 30 seconds to flush out any loosened debris.
For particularly stubborn deposits, you can leave the dryer sheet overnight.
This method isn’t just cost-effective – it’s also gentler on metal finishes than harsh chemical cleaners.
Toothbrush Detailing Technique
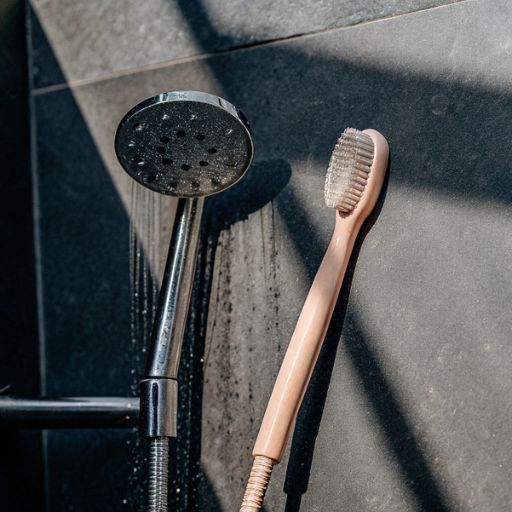
For those hard-to-reach spots that dryer sheets can’t address, a soft-bristled toothbrush serves as the perfect tool for detailed showerhead cleaning.
Take control of your shower’s maintenance by gently scrubbing between the nozzles with circular motions, focusing on mineral deposits and buildup that’s often missed by other cleaning methods.
Don’t limit yourself to just the front face – work the bristles around the edges and into the connection point where the showerhead meets the arm.
You’ll want to pair your toothbrush with a cleaning solution of equal parts white vinegar and water for maximum effectiveness.
Apply pressure strategically, letting the bristles do the work without risking damage to the finish.
Remember to rinse thoroughly after scrubbing to prevent residue from clogging the newly cleaned holes.
CLR Chemical Treatment
CLR stands as a powerful solution when regular cleaners fall short against stubborn mineral deposits.
To harness its strength, you’ll need to unscrew your showerhead and submerge it in a mixture of equal parts CLR and warm water.
If removal isn’t possible, fill a plastic bag with the solution and secure it around the showerhead with a rubber band.
Let the CLR solution work for 30 minutes, but don’t exceed this time as the chemicals can damage chrome finishes.
After soaking, rinse the showerhead thoroughly with clean water to remove all chemical residue.
You’ll want to run hot water through it for two minutes before showering.
For extremely stubborn buildup, you can repeat the process, but always test CLR on a small area first to verify it won’t harm your specific fixture’s finish.
Pressure Washer Blast

A pressure washer offers an alternative to chemical treatments when dealing with severely clogged showerheads.
You’ll need to remove the showerhead from the pipe and secure it firmly in a vise or heavy-duty clamp before proceeding.
Set your pressure washer to its lowest setting – typically around 1200-1500 PSI.
Direct the pressure washer’s stream through the inlet side of the showerhead, forcing water through in the opposite direction of normal flow.
This reverse pressure blast will dislodge mineral deposits, soap scum, and debris that’s trapped inside.
Keep the nozzle at least 12 inches away from the showerhead to prevent damage to the finish or internal components.
Once you’ve cleared the blockages, flush the showerhead with regular tap water before reinstalling it.
Boiling Water Flush
Boiling water provides one of the simplest yet effective methods to dissolve mineral buildup in your showerhead.
You’ll need a large pot of water, tongs, and protective gloves to execute this cleaning technique safely and effectively.
Unscrew your showerhead from the pipe, being careful not to damage the fixture or threading.
Once removed, submerge it completely in the pot of boiling water. Let it soak for 15-20 minutes, allowing the intense heat to break down calcium deposits and other minerals.
You’ll likely notice cloudy water and floating debris – that’s the buildup releasing from your showerhead.
After soaking, use your tongs to remove the showerhead, and give it a thorough rinse under cold water.
Reattach it to your shower arm, and you’ll notice markedly improved water flow.
Salt and Vinegar Mix
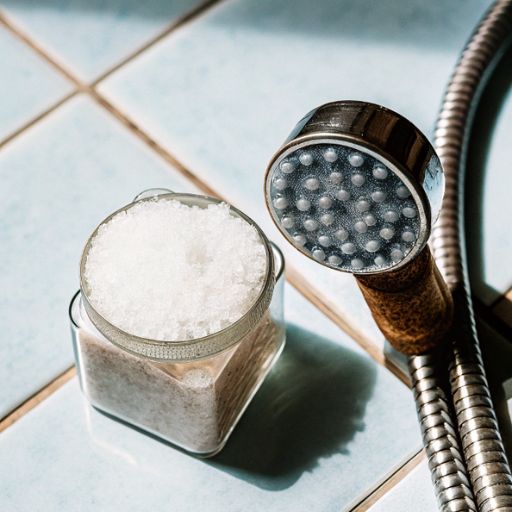
Nature’s own cleaning solution combines white vinegar’s acidic power with table salt’s abrasive properties to create an effective showerhead cleaner.
Mix 1/4 cup of table salt with 1/2 cup of white vinegar until you’ve created a thick paste.
You’ll want to remove your showerhead first, then apply this mixture directly to its surface, focusing on mineral deposits and stubborn buildup.
Let the solution sit for 15-20 minutes, allowing the vinegar’s acidity to break down calcium deposits while salt’s granules work to scrub away debris.
Using an old toothbrush, scrub the entire surface in circular motions, paying special attention to the water outlet holes.
Once you’re satisfied with the results, rinse thoroughly with hot water and reattach your showerhead.
You’ll notice immediately improved water flow and a cleaner appearance.
Mineral Oil Protection
Protecting your newly cleaned showerhead with mineral oil creates a lasting barrier against future mineral buildup and corrosion.
You’ll need to apply a thin coat of mineral oil to your showerhead’s surface after every deep cleaning session.
Don’t worry about using too much – a few drops will do the trick.
Simply dip a microfiber cloth in mineral oil and wipe down all surfaces of your showerhead, including the nozzles and mounting hardware.
The oil won’t affect your water flow but will repel hard water deposits and soap scum.
You can expect this protective barrier to last about three months before you’ll need to reapply.
For chrome or brushed nickel finishes, you’ll want to buff the surface after application to prevent any streaking or fingerprints.
Dawn Dish Soap Solution

A gentle yet effective cleaning solution combines Dawn dish soap with warm water to dissolve stubborn buildup on your showerhead.
Mix one tablespoon of Dawn with two cups of warm water in a spray bottle, then thoroughly coat your showerhead’s surface.
Let the solution sit for 15-20 minutes while it breaks down soap scum and mineral deposits.
For deeper cleaning, remove your showerhead and submerge it in a bowl filled with the same Dawn solution for up to 30 minutes.
Use an old toothbrush to scrub between the nozzles, ensuring you don’t damage the finish.
You’ll find that Dawn’s grease-cutting properties work wonders on hard water stains and calcium buildup.
Once clean, rinse thoroughly with hot water and wipe dry with a microfiber cloth to prevent water spots.
Ultrasonic Cleaning Device
While Dawn dish soap offers effective manual cleaning, ultrasonic cleaning devices represent modern technology’s answer to deep showerhead maintenance.
These compact machines use high-frequency sound waves to create microscopic bubbles that implode, generating intense scrubbing action at a molecular level.
To use an ultrasonic cleaner, you’ll need to unscrew your showerhead and place it in the device’s tank filled with a specialized cleaning solution.
Set the timer for 10-15 minutes, and let the ultrasonic waves do the work.
The vibrations will penetrate deep into every crevice, dislodging mineral deposits, bacteria, and debris that manual cleaning can’t reach.
For stubborn buildup, you can run a second cycle.
Once finished, rinse thoroughly with clean water and reinstall.
You’ll notice immediately improved water flow and spray pattern consistency.
Tea Tree Oil Disinfectant

Tea tree oil serves as a powerful natural disinfectant for your showerhead, offering both antimicrobial and antifungal properties that combat harmful microorganisms.
You’ll need to mix 10 drops of pure tea tree oil with one cup of warm water in a spray bottle for the most effective solution.
Remove your showerhead and spray the mixture thoroughly onto all surfaces, paying special attention to the water holes.
Let it sit for 30 minutes while the oil’s natural compounds break down buildup and kill bacteria.
If you can’t remove the showerhead, tie a plastic bag filled with the solution around it instead.
After treatment, rinse thoroughly with hot water.
You’ll notice improved water flow and a fresher smell.
Repeat this process monthly to maintain a clean, naturally sanitized showerhead without harsh chemicals.
Hydrogen Peroxide Treatment
Hydrogen peroxide offers a highly effective, budget-friendly solution for deep-cleaning mineral deposits and bacteria from your showerhead.
You’ll need a plastic bag, rubber band, and 3% hydrogen peroxide solution to get started.
Fill the plastic bag halfway with hydrogen peroxide, then submerge your showerhead into the solution.
Secure the bag tightly around the neck of the showerhead using the rubber band.
Let it soak for 2-3 hours, though you can leave it overnight for stubborn buildup.
When you’re done, remove the bag and run hot water through the showerhead for 2 minutes to flush out any remaining deposits.
You’ll notice immediately clearer spray patterns and stronger water pressure.
For maintenance, repeat this treatment every 3-4 months to keep your showerhead performing at its peak.
Denture Tablet Soak
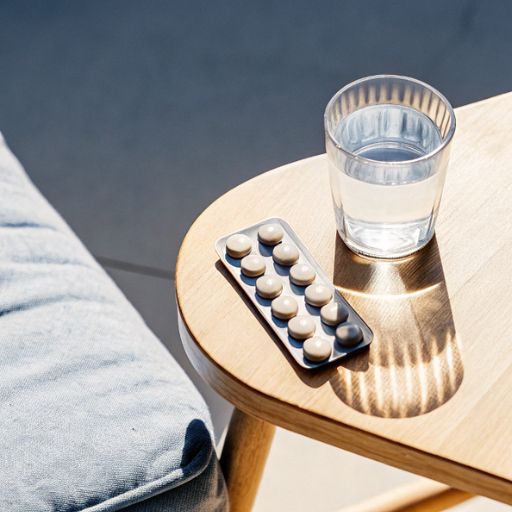
Leveraging the cleaning power of denture tablets provides an unexpectedly effective method for dissolving mineral buildup in your showerhead.
Drop two effervescent tablets into a plastic bag filled with warm water, then secure the bag around your showerhead with a rubber band.
You’ll want to completely submerge the nozzles in the solution.
Let the mixture work its magic for 30 minutes while the fizzing action breaks down calcium deposits and other stubborn residue.
For severely clogged showerheads, you can extend the soaking time to one hour.
Once time’s up, remove the bag and run hot water through the showerhead for two minutes to flush out any loosened debris.
You’ll notice immediately improved water flow and a cleaner, brighter finish on your showerhead’s surface.
Wire Brush Method
While chemical solutions work well for internal cleaning, a wire brush tackles the external buildup that can plague your showerhead’s appearance and performance.
You’ll want to use a small brass or stainless steel wire brush, as these materials are strong enough to remove mineral deposits without scratching your fixture’s finish.
Start by wetting the showerhead’s surface, then firmly scrub in a circular motion around each nozzle opening.
Don’t forget to address the edges where the showerhead meets the arm, as calcium often accumulates in these crevices.
For stubborn deposits, spray white vinegar directly onto the surface and let it sit for 5 minutes before scrubbing.
Finish by wiping the showerhead with a microfiber cloth to remove any loose debris and restore its shine.
WD-40 Mineral Removal
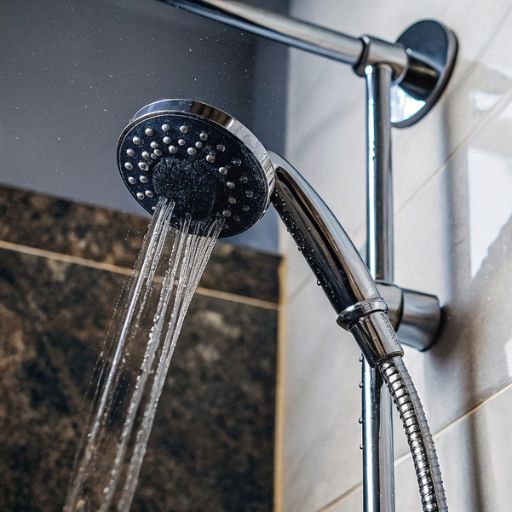
For those dealing with stubborn mineral deposits, WD-40 offers a surprisingly effective solution that penetrates and loosens calcium buildup on showerheads.
Simply spray WD-40 directly onto the mineral-affected areas and let it sit for 10-15 minutes to break down the deposits.
Take a soft microfiber cloth and wipe the showerhead thoroughly, working in a circular motion to remove the loosened minerals.
For hard-to-reach spots, you’ll want to use a small brush or cotton swab dipped in WD-40.
Once you’ve removed all visible deposits, rinse the showerhead completely with hot water to wash away any remaining WD-40 residue.
Don’t forget to run hot water through your showerhead for at least two minutes before taking your next shower to guarantee all chemical traces are gone.
Steam Cleaning Process
Through the power of high-temperature vapor, steam cleaning offers an eco-friendly approach to dissolving mineral deposits and grime from your showerhead.
To harness steam’s natural cleaning ability, you’ll need a handheld steamer with a narrow nozzle attachment and protective gloves.
Direct the steam jet toward the showerhead’s nozzles for 30-45 seconds per section, maintaining a distance of 2-3 inches.
You’ll notice the heat loosening stubborn buildup almost immediately.
For enhanced results, wipe the surface with a microfiber cloth between steam applications.
Don’t forget to target the arm and mounting bracket, where hidden deposits often accumulate.
If your showerhead is detachable, hold it at a 45-degree angle while steaming to allow dissolved debris to drain naturally.
Finish by running hot water through the showerhead for one minute to flush any remaining residue.
FAQs
How Often Should I Clean My Showerhead to Prevent Mineral Buildup?
You’ll want to deep clean your showerhead every 1-2 months if you’re dealing with hard water, or every 3-4 months with soft water. Don’t wait for visible buildup—regular maintenance keeps water flowing freely.
Can I Use Multiple Cleaning Methods at Once for Better Results?
You shouldn’t combine cleaning methods, as mixing different solutions can create harmful fumes or chemical reactions. Instead, choose one effective method and follow it through for ideal, safe results on your showerhead.
Will Cleaning My Showerhead Affect Its Water Pressure Performance?
You’ll actually improve your water pressure by cleaning your showerhead. Removing mineral deposits and debris unclogs the spray holes, restoring ideal flow. It’s like giving your showerhead a performance-enhancing maintenance upgrade.
Are These Cleaning Methods Safe for All Types of Showerhead Finishes?
While you might worry about damage, most cleaning methods are safe for chrome and brushed finishes. You’ll need to avoid vinegar on brass or gold-plated showerheads though – stick to mild soap solutions instead.
Should I Remove the Showerhead From the Pipe Before Deep Cleaning?
You’ll get better cleaning results by removing the showerhead first. It allows you to soak it thoroughly and clean hard-to-reach spots. However, if you’re not confident with plumbing, cleaning it attached works too.
Final Thoughts
Your shower’s transformation mirrors nature’s own renewal process – just as spring rain washes winter’s remnants away, these cleaning methods will restore your showerhead’s energy.
You’ll notice up to 30% improved water flow after implementing these techniques, bringing back that invigorating cascade you’ve been missing.
Don’t settle for a lackluster shower experience when you’re just a few simple steps away from pristine perfection.