19 Professional Hacks for Spotless Shower Doors (#13 Changed Everything!)
You’ve probably noticed how quickly shower doors can transform from crystal clear to cloudy and spotted, making your entire bathroom look neglected.
Whether you’re battling hard water stains, soap scum, or mysterious watermarks, maintaining pristine shower glass can feel like an endless challenge.
But here’s the thing: professional cleaners have developed ingenious shortcuts that’ll revolutionize your cleaning routine.
While most people struggle with ineffective store-bought cleaners and endless scrubbing, these 19 expert-approved hacks will help you achieve spotless results in half the time—and wait until you discover the game-changing technique at #13.

Daily Squeegee Habit
Making a daily habit of squeegeeing your shower doors immediately after each shower is the single most effective way to prevent soap scum and mineral deposits from building up.
You’ll find this 30-second task eliminates hours of deep cleaning later.
Start at the top corner and work your way down in overlapping horizontal strokes, ensuring you’re catching all water droplets.
Don’t skip the edges and corners where water tends to collect.
Your squeegee should have a sharp, clean rubber blade for the best results.
Keep it hanging within arm’s reach of your shower – if you have to walk across the bathroom to get it, you’re less likely to maintain the habit.
Replace the rubber blade every six months to maintain peak performance and prevent streaking.
Rain-X Treatment for Glass
While daily squeegeeing helps prevent buildup, applying Rain-X to your shower doors creates an invisible barrier that repels water and soap scum for weeks.
You’ll find this automotive product works just as effectively in your bathroom, making cleaning considerably easier.
To apply Rain-X, first clean and dry your shower doors thoroughly.
Apply the product in small circular motions using a lint-free microfiber cloth.
Let it dry for 5-10 minutes until you see a light haze form.
Buff the haze away with a clean, dry microfiber cloth until the glass is crystal clear.
For maximum protection, apply a second coat using the same process.
You’ll notice water beading up and rolling off immediately after each shower, carrying soap residue with it.
Reapply every 4-6 weeks to maintain the protective barrier.
White Vinegar Steam Bath
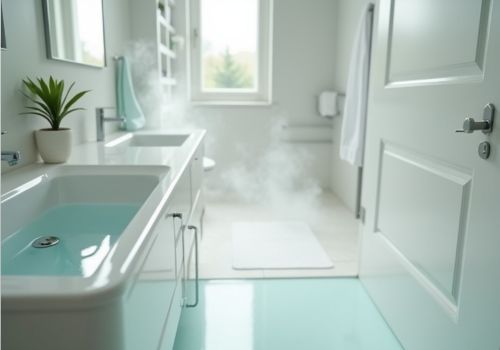
For stubborn soap scum and mineral deposits, a vinegar steam bath transforms your shower doors without harsh chemicals.
Fill your bathroom sink with boiling water and add two cups of white vinegar.
Close the bathroom door and windows, creating a sealed environment.
Let the vinegar steam circulate for 30 minutes while the shower doors remain closed.
The hot vinegar vapors will soften hardened residue and break down mineral buildup.
After steaming, spray the doors directly with undiluted white vinegar, let it sit for five minutes, then wipe with a microfiber cloth.
For extra-tough spots, dip your cloth in the warm vinegar solution and scrub gently in circular motions.
You’ll notice the glass becoming crystal clear as the acidic properties dissolve years of accumulated scale and soap scum.
Lemon and Salt Scrub
This natural cleaning duo packs a powerful punch against shower door grime.
Cut a large lemon in half and sprinkle coarse salt directly onto the cut side.
You’ll want to use kosher or sea salt rather than table salt for better scrubbing power.
Press the salted lemon against your shower door and scrub in circular motions, focusing on areas with heavy soap scum or water spots.
The citric acid breaks down mineral deposits while the salt acts as a gentle abrasive.
Don’t worry about pressing too hard – the salt’s texture does the work for you.
Once you’ve covered the entire surface, let the mixture sit for 5 minutes.
Rinse thoroughly with warm water and wipe dry with a microfiber cloth.
You’ll notice the glass has a streak-free shine that’ll last for weeks.
Dryer Sheet Magic
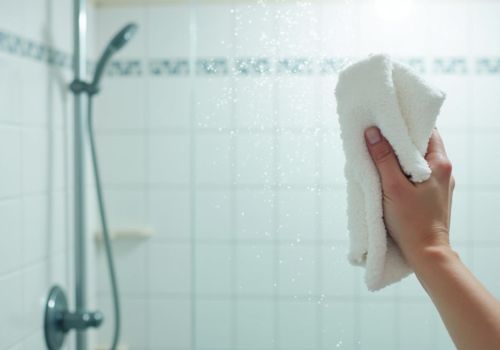
Every used dryer sheet contains residual fabric softener that’s perfect for tackling soap scum on shower doors.
Simply dampen a used dryer sheet and wipe down your glass shower doors in circular motions.
The antistatic properties help repel future soap scum and water spots, while the fabric softener breaks down existing buildup.
For stubborn areas, let the dryer sheet sit on the spot for 15-20 minutes before scrubbing.
You’ll notice the soap scum loosens considerably, making it easier to wipe away.
This hack works especially well on textured glass surfaces where traditional cleaners often miss tight spots.
To maintain results, keep a small container of used dryer sheets in your bathroom and quickly wipe down the doors after each shower.
You’ll spend less time deep cleaning and more time enjoying your crystal-clear shower doors.
Dawn and Vinegar Spray
A powerful DIY cleaning solution combines equal parts white vinegar and Dawn dish soap to create a shower door’s worst enemy.
Mix these ingredients in a spray bottle, shake well, and let the chemistry work its magic.
The vinegar’s acidity breaks down mineral deposits while Dawn’s grease-cutting properties tackle soap scum.
Spray the mixture generously on your shower doors and let it sit for 10-15 minutes.
Don’t worry about the strong vinegar smell – it’ll dissipate quickly.
For tough spots, use a non-abrasive sponge to gently work the solution into the glass.
You’ll notice the grime loosening immediately.
Rinse thoroughly with warm water, then squeegee or wipe dry with a microfiber cloth.
For best results, apply this treatment weekly to maintain crystal-clear shower doors.
Tea Tree Oil Solution
Natural tea tree oil stands out as a powerful antifungal and antibacterial agent for shower door cleaning.
You’ll need 10 drops of tea tree oil, 2 cups of warm water, and 2 tablespoons of white vinegar to create this effective solution.
Mix the ingredients in a spray bottle, shake well, and spray directly onto your shower doors.
Let it sit for 5-10 minutes while the tea tree oil’s natural properties break down soap scum and kill mold.
Using a microfiber cloth, wipe the surface in circular motions, paying special attention to corners and tracks.
You can also add 3 drops of tea tree oil to your regular shower cleaner to boost its antimicrobial power.
For ongoing protection, spray this solution after each shower – you’ll prevent buildup and maintain crystal-clear doors with minimal effort.
Microfiber Only Method
Through daily maintenance, the microfiber only method proves remarkably effective for keeping shower doors spotless without harsh chemicals.
You’ll need two microfiber cloths: one dedicated to wiping down the doors while they’re wet, and another for final polishing when dry.
After each shower, while the glass is still wet, take your first microfiber cloth and wipe down the entire door surface using straight, overlapping strokes from top to bottom.
Don’t forget the edges and corners where buildup often occurs.
Once the door has completely air-dried, use your second microfiber cloth to buff away any remaining water spots or streaks.
The ultra-fine fibers trap minerals and soap residue rather than just pushing them around, preventing long-term scale buildup that’s harder to remove later.
Fabric Softener Glass Shield
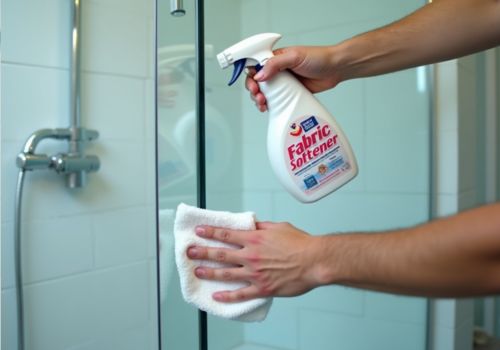
Creating a protective barrier for your shower doors, fabric softener functions as an unexpected yet effective shield against soap scum and mineral deposits.
Mix one part fabric softener with four parts warm water in a spray bottle, then spritz the solution onto your clean shower doors.
Using circular motions, wipe the mixture across the entire surface with a dry microfiber cloth until you’ve created an invisible protective layer.
You’ll need to reapply this shield weekly, but you’ll notice water beads up and rolls off rather than clinging to the glass.
This repellent effect means less scrubbing during your regular cleaning routine.
For best results, spray the solution after each shower while the door is still warm – the heat helps the fabric softener molecules bond with the glass surface, creating a longer-lasting barrier.
Baking Soda Paste Power
Effortlessly tackling stubborn soap scum, a homemade baking soda paste serves as a powerful yet gentle abrasive for your shower doors.
Mix equal parts baking soda and water until you achieve a spreadable consistency that’ll stick to vertical surfaces without dripping.
Apply the paste using circular motions with a non-abrasive sponge, focusing on areas with heavy buildup.
You’ll notice the paste’s micro-granules breaking down mineral deposits and soap residue without scratching your glass.
Let it sit for 10-15 minutes, allowing the alkaline properties to dissolve grime.
Spray with white vinegar for an extra boost – the fizzing reaction helps lift away stubborn spots.
Wipe clean with a wet microfiber cloth, then dry thoroughly. You’re left with crystal-clear doors that’ll stay cleaner longer.
Essential Oil Barrier Treatment
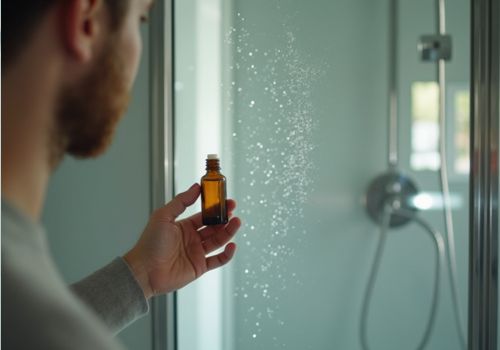
After your shower doors are spotless from the baking soda treatment, you’ll want to prevent future buildup with a natural protective barrier.
Mix 15 drops of lemon essential oil with 2 tablespoons of coconut oil to create your protective solution.
The citrus oils break down soap scum while creating an invisible shield against water spots.
Apply the mixture to your clean shower doors using a microfiber cloth, working in small circular motions.
Let it sit for 10 minutes, then buff off any excess with a clean, dry microfiber cloth.
Don’t skip this step – removing excess oil prevents slippery residue.
This treatment creates a water-repelling barrier that lasts up to two weeks, making future cleaning easier.
For best results, reapply the treatment every other week after your regular cleaning routine.
Professional Glass Sealing Tips
Professional-grade glass sealing products offer superior protection compared to DIY treatments.
You’ll find these sealants at specialty glass shops or through professional suppliers, typically lasting 3-5 years with proper maintenance.
Before applying, thoroughly clean and dry your shower doors, ensuring there’s no soap scum or mineral deposits.
Apply the sealant in thin, even strokes using a microfiber applicator, working from top to bottom.
You’ll need two coats, waiting 15 minutes between applications. Many pros recommend RainX Professional or Invisible Shield Glass Treatment for best results.
Let the final coat cure for 24-48 hours before exposing it to water.
For maximum effectiveness, maintain your sealed doors by squeegee-ing after each shower and wiping them weekly with a microfiber cloth.
This professional-grade barrier will repel water, prevent hard water stains, and make cleaning considerably easier.
Water Repellent Wax Application

Water repellent wax creates a durable, hydrophobic barrier on your shower doors when applied correctly.
You’ll need to apply the wax in small, circular motions using a microfiber cloth, working from top to bottom in overlapping sections.
Don’t rush this process – proper coverage is vital for lasting results.
Let the wax cure for 10-15 minutes until it forms a slight haze.
Then buff the surface with a clean, dry microfiber cloth until you achieve a crystal-clear finish.
For maximum protection, apply a second coat after 24 hours.
This double-layer technique guarantees complete coverage and extends the life of your water-repellent barrier.
Reapply the wax every 3-4 months to maintain its effectiveness.
You’ll know it’s time for a fresh application when water stops beading up on the glass surface.
Natural Stone Cleaner Recipe
Creating a safe stone cleaner for your shower doors requires just three simple ingredients from your kitchen: white vinegar, liquid castile soap, and warm distilled water.
Mix one cup of white vinegar with two tablespoons of liquid castile soap in a spray bottle, then fill the remainder with warm distilled water. Shake gently to combine.
You’ll want to use distilled water to prevent mineral deposits from forming on your stone surfaces.
Spray the mixture directly onto your shower doors, let it sit for 2-3 minutes, then wipe clean with a microfiber cloth.
For stubborn areas, use a soft-bristled brush in circular motions.
This natural solution won’t harm your stone surfaces while effectively removing soap scum, hard water stains, and everyday grime.
You can store any leftover solution for up to two weeks.
Prevention Through Proper Ventilation
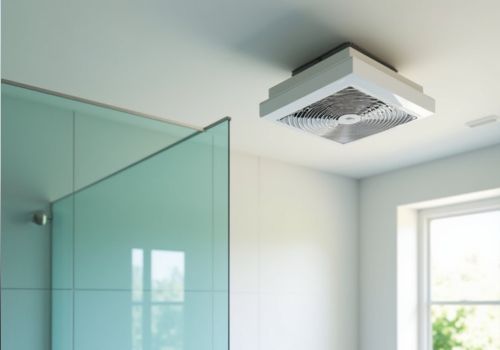
Proper ventilation serves as your first line of defense against stubborn shower door buildup.
You’ll need to run your bathroom exhaust fan during every shower and for at least 30 minutes afterward.
If you don’t have a fan, crack open a window or leave your bathroom door ajar while showering.
Install a high-quality bathroom fan rated for your space’s square footage.
You’ll want at least 1 CFM (cubic feet per minute) of ventilation power per square foot of bathroom area.
Position it near your shower enclosure for maximum effectiveness.
Don’t forget to clean your fan’s cover monthly – a dusty fan can’t properly remove moisture.
Consider using a small dehumidifier in your bathroom if you’re still battling excess moisture.
This extra step can dramatically reduce water spots and mineral deposits.
Weekly Maintenance Schedule
Establishing a consistent weekly cleaning routine prevents soap scum and hard water stains from gaining a stubborn foothold on your shower doors.
Set aside 15 minutes every Sunday to spray your doors with a mixture of white vinegar and water (1:1 ratio), letting it sit for 5 minutes.
Wipe down with a microfiber cloth, working from top to bottom.
Don’t forget the tracks and handles.
Keep a squeegee in your shower and spend 30 seconds after each use quickly removing water droplets.
On Wednesdays, do a quick spritz with a daily shower spray and wipe with a dry microfiber cloth.
You’ll cut your deep-cleaning time in half and maintain crystal-clear doors with minimal effort.
For extra protection, apply a rain-repellent coating once every three months.
Commercial Products Worth Buying
While homemade solutions work well, several commercial products stand out for their exceptional performance on shower doors.
Bio-Clean’s non-toxic formula effectively removes mineral deposits and hard water stains without harsh chemicals.
Rain-X’s Original Glass Treatment creates an invisible barrier that repels water, preventing soap scum buildup for up to six months.
CLR’s Pro Calcium Lime Rust Remover tackles the toughest mineral deposits, while Wet & Forget Shower Weekly Maintenance spray eliminates the need for scrubbing – just spray and walk away.
For serious buildup, Magic Eraser Bath with Gain Original Scent cuts through soap scum instantly.
Don’t overlook Mr. Clean’s Glass & Multi-Surface Cleaner with its streak-free formula and built-in water repellent that keeps doors crystal clear longer.
Hard Water Stain Removal
Hard water stains can seem impossible to remove once they’ve established themselves on shower doors, but several proven techniques effectively eliminate these chalky, white deposits.
Mix equal parts white vinegar and water in a spray bottle, saturate the affected areas, and let it sit for 30 minutes.
For stubborn deposits, create a paste using baking soda and water, then apply it directly to the stains.
You’ll need to tackle heavy mineral buildup with a pumice stone, working in gentle circular motions to avoid scratching the glass.
For extremely resistant stains, try CLR or similar calcium-dissolving products, but test on a small area first.
Once you’ve removed the stains, prevent future buildup by applying a rain-repellent product like Rain-X to create a protective barrier that water will simply slide off.
Glass Protection System

Protection against water damage begins with a professional-grade glass protection system for your shower doors.
You’ll want to apply a hydrophobic coating that creates an invisible barrier, preventing mineral deposits and soap scum from bonding to the glass surface.
Choose a polymer-based sealant that’s specifically designed for shower glass, as these typically last 3-5 years.
Apply your protection system in two stages: first, deep clean and prepare the surface using an acidic cleaner to remove any existing residue.
Then, apply the sealant using a microfiber cloth in overlapping circular motions.
Let it cure for 24 hours before exposing it to water.
You’ll notice water beading up and rolling off immediately, making future cleaning much easier.
Reapply the system annually to maintain maximum protection.
FAQs
Can Shower Door Cleaning Products Damage Colored or Printed Glass Designs?
Yes, harsh shower cleaners can damage colored or printed glass designs. You’ll want to use pH-neutral products specifically made for decorated glass, or stick to gentle solutions like vinegar and water to protect your custom designs.
How Often Should Professional Glass Restoration Services Be Scheduled?
You’ll need professional glass restoration every 3-5 years if you maintain regular cleaning. However, if you notice heavy mineral buildup, scratches, or clouding, don’t wait – schedule service right away to prevent permanent damage.
Do Magnetic Water Softeners Help Prevent Shower Door Buildup?
While magnetic water softeners aren’t proven to effectively prevent shower door buildup, you’ll get better results using a traditional salt-based water softener system that actually removes hard water minerals through ion exchange.
Are Steam Cleaners Safe for Frameless Shower Door Seals?
You’ll need to be cautious with steam cleaners on frameless shower door seals. While they’re effective cleaners, excessive heat can damage or weaken rubber seals over time. It’s best to use lower temperatures or alternative cleaning methods.
Will Shower Door Cleaning Methods Work on Textured or Frosted Glass?
Where there’s a will, there’s a way! You’ll need gentler methods for textured or frosted glass. Don’t scrub too hard – instead, use non-abrasive cleaners and microfiber cloths to preserve the special finish.
Final Thoughts
You’ll find these professional shower door cleaning hacks transform your daily routine from drudgery to efficiency.
By incorporating methods like the game-changing vinegar steam treatment and Rain-X barrier, you’re creating a maintenance system that’ll stand the test of time.
Whether you’re wielding your trusty squeegee or channeling your inner alchemist with DIY solutions, these proven techniques guarantee your shower doors remain crystal clear and spot-free.