15 Sink Cleaning Mistakes That Are Making You Sick (Stop #8 Today!)
Like Pandora’s box releasing hidden troubles, your sink harbors countless dangers you’ve probably never considered.
While you’re diligently wiping down counters and sweeping floors, lurking bacteria and harmful pathogens could be multiplying in overlooked areas of your sink, threatening your family’s health.
From neglected overflow drains to contaminated faucet aerators, these common cleaning oversights aren’t just unpleasant—they’re potentially dangerous.
You’ll be surprised to learn how many of these toxic mistakes you’re making right now, but don’t worry; we’ve got the solutions to transform your sink from a health hazard into a truly clean space.

Neglecting the Overflow Drain
Inside of many bathroom sinks lies a frequently forgotten component – the overflow drain.
This small opening near the top of your sink prevents water from spilling over the edges when the main drain is plugged.
While you might clean your primary drain regularly, the overflow drain often collects mold, bacteria, and biofilm without your knowledge.
You’ll need to clean this area at least once every two months.
Simply wrap a small cleaning brush with a microfiber cloth, spray it with disinfectant, and scrub inside the overflow opening.
You can also pour a mixture of baking soda and vinegar down this drain, followed by hot water.
Don’t ignore strange odors coming from this area – they’re usually a sign that harmful bacteria have made themselves at home in your overflow drain.
Using Harsh Chemical Combinations
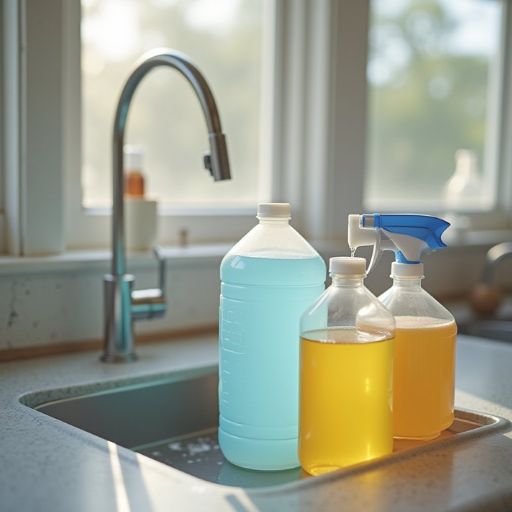
Cleaning-product combinations can create dangerous chemical reactions in your sink drain.
When you mix bleach with ammonia-based cleaners, you’ll create toxic chloramine gas that can cause severe respiratory issues.
Combining bleach and vinegar produces chlorine gas, which can be lethal in confined spaces like bathrooms.
You don’t need multiple harsh chemicals to clean your sink effectively.
Instead, stick to one cleaning product at a time, and always rinse thoroughly between different products.
If you’re unsure about a combination, check the product labels or use natural alternatives.
Baking soda followed by vinegar (after the baking soda is rinsed away) can safely clear most clogs.
For tough buildup, use a commercial drain cleaner alone, and never mix it with other cleaning agents.
Forgetting to Clean Faucet Aerators
While safe cleaning practices protect your sink’s drains, many homeowners overlook another common problem area – the faucet aerator.
This small screen attachment at the tip of your faucet traps sediment, mineral deposits, and bacteria over time.
When left uncleaned, these buildups can contaminate your water supply and reduce water flow.
You’ll need to unscrew the aerator every three months using pliers wrapped in cloth to prevent scratches.
Soak it in white vinegar for an hour to dissolve mineral deposits, then scrub gently with an old toothbrush.
If you notice black particles or slime, you’re dealing with bacteria growth that requires immediate attention.
Don’t forget to rinse thoroughly and check the rubber washer for wear before reattaching.
A clean aerator guarantees both proper water flow and safer drinking water.
Overlooking the Drain Stopper
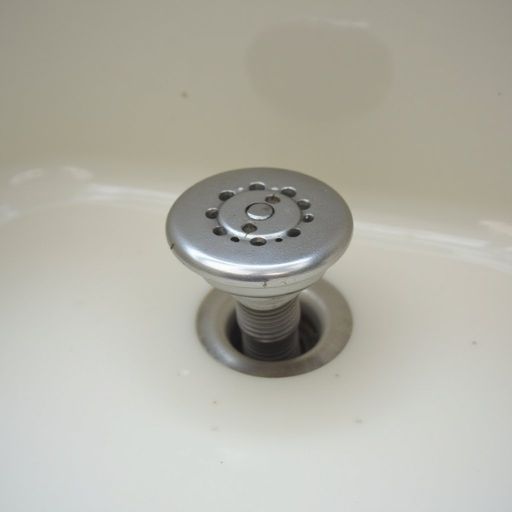
The drain stopper often becomes a neglected breeding ground for bacteria, hair, and soap scum in both bathroom and kitchen sinks.
You’ll need to remove and clean this component at least once a month to prevent dangerous buildup and maintain proper drainage.
To clean your drain stopper, simply lift it out and unscrew the mechanisms if necessary.
Use a small brush to scrub away visible debris, paying special attention to the underside where grime accumulates.
Soak it in a mixture of vinegar and baking soda for 15 minutes to dissolve mineral deposits and kill bacteria.
Once clean, rinse thoroughly with hot water and dry before reinstalling.
Don’t forget to clean the stopper housing inside the drain, as it’s equally prone to collecting debris.
A pipe brush works well for reaching this often-forgotten area.
Wrong Water Temperature
Using water at improper temperatures when cleaning your sink can greatly reduce the effectiveness of your cleaning efforts and potentially damage surfaces.
Hot water breaks down grease and grime more effectively, while cold water can cause oils to congeal and stick to surfaces, making them harder to remove.
For porcelain and ceramic sinks, start with hot water between 110-120°F to dissolve soap scum and loosen debris.
Don’t use scalding water, as extreme temperatures can damage sealants and finishes.
If you’re cleaning a stainless steel sink, moderately hot water works best, as excessive heat might warp the metal over time.
When disinfecting, maintain hot water temperature throughout the process – cooling water won’t kill bacteria effectively.
After cleaning, rinse with cool water to help seal the pores in the sink’s surface and prevent rapid resoiling.
Reusing Contaminated Cleaning Tools
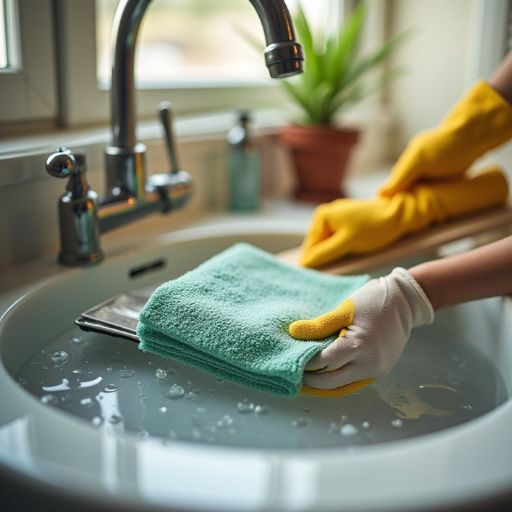
Reusing dirty sponges, rags, and brushes when cleaning your sink creates a breeding ground for harmful bacteria and cross-contamination.
These tools collect food particles, grease, and moisture, making them perfect environments for bacterial growth.
When you reuse them without proper sanitization, you’re just spreading germs around instead of cleaning.
To break free from this unhealthy cycle, replace your sponges every two weeks and wash cleaning cloths after each use.
Sanitize brushes weekly by soaking them in a solution of one part bleach to nine parts water for 10 minutes.
You can also run sponges through your dishwasher’s hot cycle or microwave them while damp for two minutes.
Don’t forget to store your cleaning tools in a well-ventilated area where they can dry completely between uses.
Irregular Garbage Disposal Maintenance
Many homeowners neglect regular garbage disposal maintenance, leading to unpleasant odors, clogs, and potential mechanical failures.
You’ll need to clean your disposal at least once a week to prevent harmful bacteria from flourishing and food particles from accumulating.
To maintain your disposal effectively, you shouldn’t just rely on running water.
Instead, create a routine that includes grinding ice cubes to sharpen the blades, followed by a mixture of baking soda and vinegar to deodorize.
You’re making a costly mistake if you’re skipping monthly deep cleaning sessions with specialized disposal cleaners.
Don’t wait until you notice foul smells or slow draining – that’s already too late.
Regular maintenance isn’t just about preventing repairs; it’s about protecting your family from harmful bacteria that can spread throughout your kitchen.
Leaving Wet Sponges Near Sink
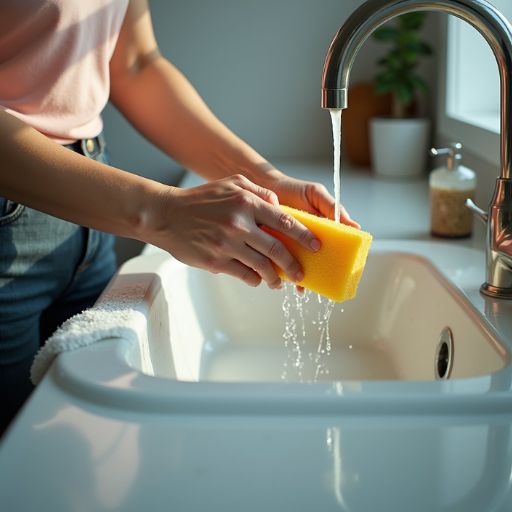
While maintaining your garbage disposal helps prevent bacteria growth, wet sponges left near the sink can create an equally concerning breeding ground for harmful microorganisms.
These damp sponges quickly become hotspots for bacteria like E. coli and salmonella, especially when they’re sitting in pools of water or pressed against wet surfaces.
You’ll want to squeeze out excess water after each use and store your sponges in a dedicated holder that allows proper airflow.
Consider using a raised dish or wire basket that keeps the sponge elevated and promotes faster drying.
Replace your sponges every two weeks, or sooner if they develop an odor.
For daily sanitizing, you can microwave a damp sponge for one minute or soak it in a mixture of water and bleach.
Don’t compromise your health by neglecting this simple yet essential habit.
Improper Disinfection Time
A common oversight in sink maintenance involves rushing through the disinfection process without allowing proper contact time.
When you’re disinfecting your sink, you’ll need to let the cleaning solution sit for the manufacturer’s recommended duration – typically 5-10 minutes – before wiping or rinsing.
You’re not actually killing germs if you immediately wipe away disinfectant.
Most cleaning products need time to break down bacteria, viruses, and other pathogens effectively.
Don’t let impatience compromise your family’s health. While the solution sits, you can tackle other kitchen tasks.
Check your disinfectant’s label for specific timing instructions.
Some natural cleaners might require longer contact times than chemical-based products.
If you’re using bleach solution, remember it needs at least 5 minutes to sanitize surfaces properly.
Skipping the Sink Edges

People often focus on cleaning the basin of their sink while neglecting its outer edges and rim, creating a perfect environment for grime and bacteria to thrive.
You’ll find the most stubborn buildup where the sink meets the counter, especially in those hard-to-reach corners and seams.
This area’s constantly exposed to water splashes, soap scum, and food particles that can lead to mold growth and bacterial contamination.
If you’re noticing dark spots or a sticky film around your sink’s edges, you’ve already let the problem go too far.
Make it a habit to wipe down these areas daily with a disinfectant cleaner.
Use an old toothbrush to scrub the caulking and seams where grime accumulates.
Don’t forget to dry the edges thoroughly – moisture is bacteria’s best friend.
Mixing Bleach With Hot Water
Did you know mixing bleach with hot water is a dangerous and counterproductive cleaning mistake?
When you combine bleach with hot water, the heat accelerates the release of chlorine gas, which can cause severe respiratory issues, burning eyes, and dizziness.
The hot water also breaks down the bleach’s active ingredients faster, making it less effective at disinfecting your sink.
Instead, you’ll want to use cool or room temperature water when cleaning with bleach.
Always dilute bleach according to the label’s instructions, typically using a ratio of 1 tablespoon of bleach per gallon of cool water.
If you’re looking to sanitize your sink with hot water, wait until after you’ve finished using the bleach solution and rinse thoroughly with cool water first.
Ignoring Under-Sink Leaks

While proper sink cleaning techniques are essential, what’s happening beneath your sink deserves equal attention.
Ignoring under-sink leaks can lead to toxic mold growth, structural damage, and harmful bacteria that affect your family’s health.
You’ll notice warning signs like musty odors, water stains, or warped cabinet bottoms.
Don’t wait until it’s too late – check your under-sink area monthly for drips, dampness, or discoloration.
Test connections by wiping pipes with tissue paper to detect subtle moisture.
If you spot even minor leaks, fix them immediately or call a plumber.
Remember to remove items stored under your sink regularly to inspect the area thoroughly.
This proactive approach won’t just protect your health; it’ll save you from costly repairs and guarantee your sink area stays genuinely clean and safe.
Poor Drain Strainer Maintenance
Every week, countless homeowners overlook one of the most essential sink maintenance tasks – proper drain strainer care.
Your drain strainer’s tiny holes trap food particles, hair, and debris that would otherwise clog your pipes, but when you’re not maintaining it regularly, it becomes a breeding ground for harmful bacteria.
You’ll want to remove your drain strainer at least twice a week and scrub it thoroughly with hot, soapy water.
Don’t forget to clean both sides, paying special attention to the mesh or perforated surface where grime tends to accumulate.
If you notice black slime or an unpleasant odor, soak the strainer in a mixture of white vinegar and baking soda for 15 minutes before scrubbing.
Replace your strainer immediately if you spot rust or damage, as these defects can harbor dangerous pathogens.
Cross-Contaminating Kitchen and Bathroom
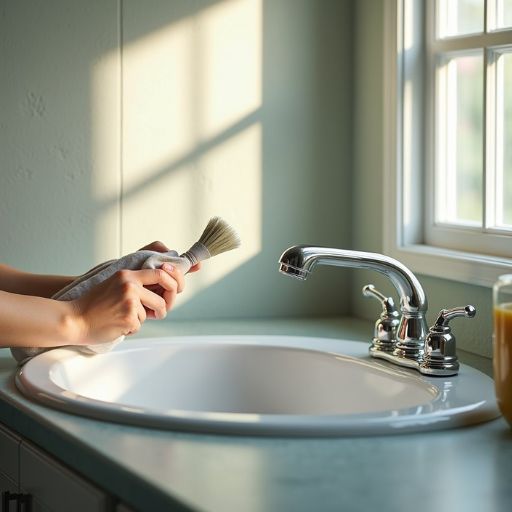
Keeping your cleaning tools separate for different areas of your home can be just as important as maintaining a clean drain strainer.
When you use the same sponges, cloths, or brushes to clean both your kitchen and bathroom sinks, you’re potentially spreading harmful bacteria between these spaces.
Bathroom sinks harbor microorganisms from personal hygiene activities, while kitchen sinks contain food-related bacteria.
To prevent cross-contamination, establish a color-coding system for your cleaning supplies.
Use blue tools for the bathroom and green for the kitchen, or any combination that works for you.
Store these supplies in separate caddies or containers, and never mix them.
You’ll also want to replace your cleaning tools regularly, as they can become breeding grounds for bacteria even when properly separated.
Infrequent P-Trap Cleaning
Many homeowners overlook their sink’s P-trap, that U-shaped pipe beneath the drain, until it’s completely clogged or emitting foul odors.
This curved pipe section isn’t just a random design – it’s your first defense against sewer gases and a collection point for debris that could harm your plumbing system.
You’re putting your health at risk by not cleaning your P-trap regularly.
The trapped water inside prevents toxic sewer gases from entering your home, but when gunk builds up, it can release harmful bacteria and unpleasant smells.
To maintain it, you’ll need to remove the P-trap every few months, clean out accumulated debris, and check for leaks.
Don’t wait for problems to develop – a few minutes of preventive maintenance will save you from costly repairs and potential health issues.
FAQs
How Often Should I Replace My Kitchen Sink Completely?
You’ll need to replace your kitchen sink every 15-20 years, but this timeline can vary based on material quality and usage. If you notice cracks, leaks, or severe staining, don’t wait—replace it sooner.
Can Vinegar Damage Sink Pipes Over Time With Regular Use?
You won’t damage your pipes using vinegar for cleaning. While it’s acidic, household vinegar (5% acetic acid) is too mild to corrode plumbing. You’re safe to use it regularly in your cleaning routine.
What’s the Safest Way to Unclog a Sink Without Tools?
First, pour boiling water down your drain. Next, add 1/2 cup baking soda, followed by 1/2 cup vinegar. Listen for the fizz! Wait 15 minutes, then flush with more hot water.
Are Touchless Faucets More Hygienic Than Traditional Ones?
Yes, touchless faucets are more hygienic since you won’t need to touch handles with dirty hands. They’ll reduce cross-contamination and bacterial spread, though you’ll still need to clean the faucet itself regularly for ideal hygiene.
Should Different Sinks in the House Be Cleaned in Specific Order?
You’ll want to clean your bathroom sinks first, then kitchen sink last. This order prevents cross-contamination since your kitchen sink typically harbors more bacteria from food prep and dirty dishes.
Final Thoughts
Your sink harbors more bacteria than you’d think, and these cleaning oversights can seriously impact your health.
Just last month, a Minnesota family traced their recurring respiratory issues to black mold in their overflow drain, which they’d never cleaned in five years.
By addressing these nine common mistakes, particularly the often-neglected overflow drain and aerator maintenance, you’ll create a safer, healthier kitchen environment for your household.