15 Dangerous Mistakes Keurig Owners Make Daily (Stop #6 Before Your Next Cup!)
If you’ve ever experienced a less-than-perfect cup from your beloved Keurig, you’re not alone in maneuvering the complexities of single-serve coffee brewing.
While these machines offer convenience and consistency, there are several common practices that can turn your morning ritual into an unfortunate situation.
From mineral buildup that silently damages your brewer to potentially harmful bacteria lurking in reused pods,you might be compromising both your coffee quality and your health without realizing it.
Before you brew your next cup, you’ll want to guarantee you’re not making any of these critical mistakes that could be costing you more than just a mediocre coffee experience.

Never Descaling Your Machine
Calcium deposits and mineral buildup can severely impact your Keurig’s performance over time.
These accumulations restrict water flow, clog internal components, and ultimately reduce brewing efficiency.
You’ll notice symptoms like slower brewing, incomplete cup fills, and strange-tasting coffee.
To prevent these issues, you need to descale your machine every 3-6 months, depending on your water hardness and usage frequency.
Don’t wait until you notice problems – regular descaling maintains peak performance and extends your machine’s lifespan.
You can use Keurig’s descaling solution or a mixture of white vinegar and water.
The process takes about 30 minutes: run the solution through your machine, follow with multiple water-only cycles to rinse, and you’re back to brewing perfect cups.
Skip this maintenance, and you’re risking permanent damage to your investment.
Using Tap Water

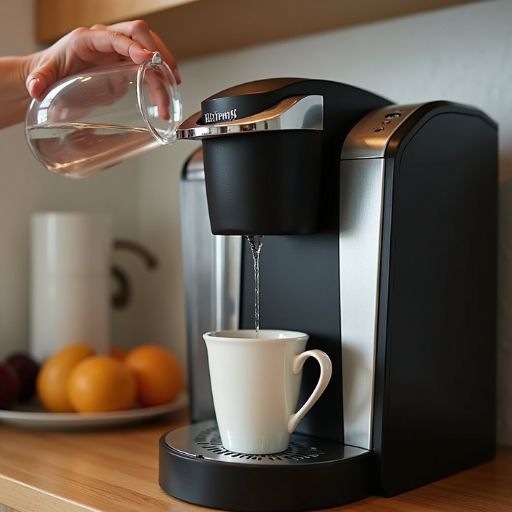
While tap water might seem like a convenient choice for your Keurig, it’s often loaded with minerals and impurities that can damage your machine.
These minerals, particularly calcium and magnesium, gradually accumulate inside your brewer’s components, forming scale buildup that restricts water flow and affects heating efficiency.
You’ll want to use filtered or bottled water instead. If you’re committed to tap water, install a water filter directly on your faucet or use a filtered pitcher.
The ideal water for your Keurig should have minimal mineral content but shouldn’t be distilled or softened, as these lack the minerals necessary for optimal extraction and taste.
Leaving Water in Tank
Standing water in your Keurig’s reservoir for extended periods creates an ideal environment for bacterial growth and mineral deposits.
When you leave water stagnant for days, you’re risking the development of biofilm, a slimy bacterial colony that can affect both your machine’s performance and your coffee’s taste.
Empty your water reservoir daily, and don’t refill it until you’re ready to brew your next cup.
If you won’t use your Keurig for several days, drain the internal components by running the brew cycle without a K-cup until no more water dispenses.
Then, empty the reservoir completely and leave it dry.
When you return to using your machine, run two cleansing brew cycles with fresh water before making your first cup of coffee.
This practice guarantees you’re always brewing with clean, fresh water.
Reusing K-Cups

Reusing K-Cups repeatedly compromises both the flavor quality and safety of your coffee.
The filter inside each K-Cup is designed for single use, and it begins breaking down after the first brew.
When you reuse pods, you’re exposing yourself to potential bacterial growth that thrives in the warm, moist environment of a used K-Cup.
You’ll notice the second brew produces considerably weaker coffee because most of the flavor compounds were extracted during the initial use.
The puncture holes from the first brew also affect water pressure and flow rate, leading to inconsistent extraction.
If you’re looking to save money, invest in a reusable K-Cup filter specifically engineered for multiple uses.
These filters are constructed with durable materials that withstand repeated brewing cycles and proper cleaning, ensuring both safety and peak flavor extraction.
Ignoring Size Settings
Many Keurig owners disregard their machine’s size settings, assuming all K-Cups work uniformly across every brew size option.
This misconception leads to inconsistent and often disappointing coffee experiences.
Each K-Cup is optimized for a specific brew size, typically 8 ounces.
When you select a larger setting, like 10 or 12 ounces, you’re fundamentally diluting the same amount of coffee grounds with more water, resulting in a weaker cup.
Conversely, choosing a smaller size creates an overly concentrated brew that might taste bitter or harsh.
To maximize your coffee’s flavor profile, check the recommended brew size on your K-Cup packaging.
If you prefer larger servings, consider using K-Cups specifically designed for travel mug sizes, or opt for two separate brewing cycles using fresh pods.
Not Cleaning Exit Needle

A frequently overlooked maintenance task involves the Keurig’s exit needle, which can become clogged with coffee oils, grounds, and mineral deposits over time.
When you don’t clean this vital component, you’ll experience weak coffee flow, incomplete brewing cycles, and potential machine damage.
To clean the exit needle, you’ll need to locate it under the K-cup holder.
Remove the holder assembly and locate the sharp needle that punctures your pods.
Using a paperclip or Keurig’s cleaning tool, carefully clear any debris from the needle’s opening.
For stubborn buildup, mix equal parts water and white vinegar, fill a pod with the solution, and run multiple brewing cycles.
You should perform this maintenance at least monthly, or more frequently if you’re brewing multiple cups daily.
Don’t wait until you notice brewing problems – prevention beats repairs.
Wrong Pod Placement
While proper needle maintenance keeps your Keurig running smoothly, incorrect pod placement can sabotage even a well-maintained machine.
You’ll know you’ve made this mistake when coffee sprays everywhere or barely drips out.
To place a K-cup correctly, remove any old pod from the holder first. Insert the new pod firmly into the chamber, ensuring it sits flat and level.
The pod’s rim should rest evenly on the holder’s upper edge without tilting.
Don’t forget to completely close the lid before brewing – you should hear a distinctive click.
If you’re using reusable K-cups, make sure they’re compatible with your specific Keurig model.
Forcing an incompatible pod or placing it at an angle can damage both the pod and your machine’s puncture mechanism, leading to costly repairs.
Forgetting Filter Changes

Keeping track of filter changes can slip through the cracks for busy Keurig owners.
When you don’t replace your Keurig’s water filter every two months or after 60 tank refills, you’re risking the buildup of calcium, chlorine, and other harmful contaminants in your machine.
You’ll notice the difference in your coffee’s taste when filters aren’t maintained – it becomes bitter and metallic.
Plus, old filters can’t effectively remove impurities, forcing your Keurig to work harder and potentially shortening its lifespan.
Don’t let your investment go to waste by neglecting this critical maintenance step.
Set a reminder on your phone or mark your calendar to replace filters regularly. If you can’t remember your last change, it’s time for a new filter now.
Your taste buds and machine will thank you.
Skipping Warmup Time
Many Keurig users make another common mistake beyond filter maintenance – rushing the machine’s warmup cycle.
When you’re impatient for your morning coffee, it’s tempting to start brewing immediately after powering on your Keurig, but this shortcut can compromise your brew’s quality and temperature.
Your Keurig needs 3-5 minutes to reach ideal brewing temperature (192-197°F).
Skipping this warmup period forces the machine to brew with cooler water, resulting in under-extracted coffee that’s both weak and lukewarm.
You’ll also stress the heating element, potentially shortening your machine’s lifespan.
To get maximum flavor from your K-cups, simply hit the power button first, then complete your morning routine while the machine reaches proper temperature.
This guarantees you’ll get the full-bodied, hot cup of coffee you’re paying for.
Storing Pods Incorrectly

Proper pod storage can greatly impact your Keurig coffee’s freshness and flavor quality.
When you store K-cups improperly, you’ll compromise their built-in freshness barrier and risk degrading the coffee’s taste.
Don’t leave pods in your Keurig’s carousel or exposed to direct sunlight, as both heat and UV rays will deteriorate the coffee grounds inside.
Instead, keep your K-cups in their original packaging or an airtight container in a cool, dark pantry.
The ideal storage temperature ranges between 55-75°F (13-24°C).
You’ll also want to avoid storing pods near strong odors, as the pods’ permeable materials can absorb surrounding scents.
Check expiration dates regularly, and don’t stockpile more pods than you’ll use within 3-6 months.
By following these storage guidelines, you’ll maintain your coffee’s intended flavor profile and guarantee each cup tastes as fresh as possible.
Neglecting Drip Tray Cleaning
The drip tray of your Keurig serves as more than just a spill collector – it’s an integral component that requires regular maintenance.
When left uncleaned, it becomes a breeding ground for bacteria, mold, and mineral deposits that can contaminate your coffee and create unpleasant odors.
You’ll want to remove and empty the drip tray at least weekly, though daily is ideal if you’re a frequent brewer.
Don’t forget to lift out the drip tray cover and clean underneath, where sticky residue often accumulates.
Use warm, soapy water to wash both pieces thoroughly, paying special attention to the corners and crevices.
For stubborn buildup, a mixture of equal parts water and white vinegar will break down mineral deposits.
Let everything dry completely before reassembling to prevent moisture-related issues.
Hard Pressing Power Button

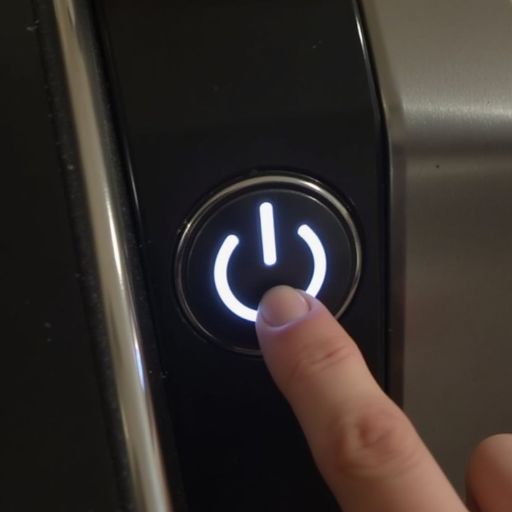
Your Keurig’s power button isn’t designed to withstand aggressive force, yet numerous users mistakenly believe that pressing harder will resolve operational issues.
This aggressive behavior can damage the internal switch mechanism, leading to complete power failure or inconsistent operation.
When you forcefully press the power button, you’re risking the destruction of delicate electrical contacts and circuit boards beneath the surface.
Instead, use a gentle, deliberate touch.
If your machine doesn’t respond to normal pressure, you’re likely dealing with a different issue that requires troubleshooting, such as a loose power connection or internal malfunction.
Don’t let frustration drive you to damage your machine.
Apply light, consistent pressure when operating any button on your Keurig.
If problems persist, consult your user manual or contact Keurig support for proper guidance.
Moving During Brewing Cycle
Moving a Keurig coffee maker during its active brewing cycle disrupts the precise water flow mechanisms and pressure systems designed to deliver ideal extraction.
When you shift the machine mid-brew, you’re interfering with the carefully calibrated pressure needed to force hot water through the K-cup’s grounds.
This movement can cause uneven distribution of water, resulting in weak or bitter coffee.
More critically, you’re risking hot water splashing outside the designated brew path, which can lead to burns or electrical hazards.
The internal components, particularly the pump and heating element, aren’t designed to operate while in motion.
To protect your safety and machine’s longevity, always let your Keurig complete its brewing cycle while stationary.
If you must relocate the machine, wait until it’s finished brewing and has fully depressurized.
Unplugging While Running

Similar to moving the machine during operation, suddenly unplugging a Keurig while it’s running creates immediate risks to both the appliance and its internal systems.
When you disconnect power during an active brewing cycle, you’re interrupting vital electrical processes that control water temperature, pump operation, and internal timing mechanisms.
This abrupt power loss can damage your Keurig’s control board, leaving water trapped in heating chambers and potentially causing electrical shorts when you restart the machine.
You’ll also risk burning out the pump if it’s mid-cycle when power cuts off.
Instead, always let your Keurig complete its brewing cycle and return to standby mode before unplugging.
If you must stop mid-brew, use the power button first, wait 30 seconds, then unplug the machine.
Never Emptying Internal Tank
Letting stagnant water sit in a Keurig’s internal tank leads to mineral buildup, bacterial growth, and potential system malfunctions.
You’ll notice reduced performance, strange tastes, and possible health risks if you don’t regularly empty and refresh the water.
To maintain your Keurig’s internal tank properly, drain it completely after each use or at least every few days.
Simply remove the water reservoir, press the brew button without a K-cup installed, and let the machine run until no more water dispenses.
For long-term storage, run a vinegar solution through the system first, then clear water to rinse.
You’ll prevent scale formation, eliminate biofilm development, and extend your machine’s lifespan.
Don’t forget to clean the reservoir with warm, soapy water before refilling it with fresh water.
FAQs
Can I Use a Keurig to Brew Loose Tea Leaves?
You shouldn’t put loose tea leaves directly in your Keurig. Instead, use a reusable K-cup filter specifically designed for tea. Fill it with your preferred leaves, but don’t overfill to prevent machine clogging.
Why Does My Keurig Make a Loud Noise When Heating?
While your Keurig’s heating process is normal, loud noises indicate the pump’s working hard to push water through mineral buildup. You’ll want to descale your machine regularly to maintain quiet, efficient operation.
How Long Do Unused K-Cups Stay Fresh?
Your unused K-cups will stay fresh for 8-12 months past their “best by” date when stored properly. You’ll get the best flavor if you keep them in a cool, dry place away from direct sunlight.
Is It Safe to Use Filtered Refrigerator Water in My Keurig?
Yes, you can safely use filtered refrigerator water in your Keurig. It’s actually ideal since it’s already filtered and temperature-controlled. Just verify your fridge’s filter is regularly maintained to prevent mineral buildup in your machine.
Can High Altitude Affect My Keurig’s Brewing Temperature?
Yes, at high altitudes, your Keurig won’t reach ideal brewing temps since water boils at lower temperatures. You’ll need to run an extra-hot cycle or adjust settings to compensate for the decreased boiling point.
Final Thoughts
Your Keurig’s lifespan hangs precariously in the balance with each brewing cycle.
You’ll face irreversible damage if you don’t implement proper maintenance protocols immediately.
Descale every 3-6 months, utilize filtered water exclusively, and never reuse K-Cups.
The internal components require systematic care to prevent bacterial growth and mineral buildup.
Don’t wait until it’s too late – your next coffee could be compromising your machine’s integrity.