11 Glass Shower Door Secrets That Will Save You Hundreds (Pro Tip #8!)
You’ve probably noticed how quickly your glass shower doors can transform from sparkling clean to cloudy and spotted, leading to costly cleaning products and potentially even replacements.
What you might not realize is that professional cleaners and maintenance specialists have been keeping money-saving secrets that’ll transform how you care for your shower doors.
From unexpected household items that work better than expensive cleaners to a game-changing maintenance technique that’ll slash your cleaning time by 90%, these proven methods will help you maintain crystal-clear glass without breaking the bank.
Let’s uncover these insider tips that the cleaning industry doesn’t want you to know.

DIY Water Repellent Treatment
Creating your own water repellent treatment for glass shower doors is both cost-effective and efficient.
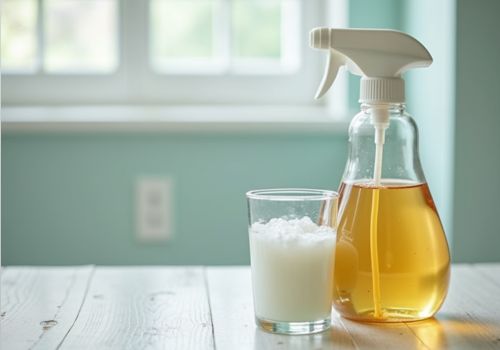
Mix equal parts white vinegar and water in a spray bottle, then add two tablespoons of Rain-X original glass treatment. Shake well before each use.
Clean your shower doors thoroughly with a non-abrasive cleaner first, then dry completely.
Spray your DIY solution evenly across the glass surface, working in small sections.
Using a microfiber cloth, buff the solution into the glass using circular motions until you don’t see any streaks.
Let it cure for 10 minutes.
You’ll need to reapply this treatment every 2-3 months, but it’ll repel water and prevent soap scum buildup effectively.
Store your remaining solution in a dark place, as light can degrade the Rain-X component.
Natural Hard Water Stain Removers

For stubborn hard water stains on glass shower doors, several natural solutions can effectively dissolve mineral deposits without harsh chemicals.
You’ll need common household items like white vinegar, lemon juice, or citric acid powder to tackle these tough spots.
Mix equal parts white vinegar and water in a spray bottle, or create a paste using citric acid powder and water.
For maximum effectiveness, you’ll want to apply your chosen solution and let it sit for 15-30 minutes.
The acidic properties will break down calcium and mineral buildup, making it easier to wipe away.
For extra stubborn deposits, wrap a vinegar-soaked microfiber cloth around the affected area and secure it with a rubber band.
You can also cut a lemon in half and rub it directly on the glass, letting its natural acids do the work.
Daily Squeegee Technique
Every effective shower glass maintenance routine starts with proper squeegee technique.
You’ll need a high-quality silicone or rubber squeegee with a comfortable grip and smooth, flexible blade.
Start at the top corner of your glass door, pressing the squeegee blade firmly against the surface at a 45-degree angle.
Work in straight, overlapping horizontal strokes, moving downward after each pass.
Don’t forget the corners and edges where water tends to accumulate.
Wipe your squeegee blade clean with a microfiber cloth between strokes to prevent streaking.
For best results, complete this process immediately after each shower while the glass is still wet and warm.
You’ll prevent 90% of hard water deposits and soap scum buildup, cutting your deep-cleaning sessions down to once every few months.
Proper Hinge Maintenance

Shower door hinges serve as critical pivot points that demand regular attention to prevent costly repairs and guarantee smooth operation.
You’ll need to inspect and clean these mechanisms every 3-4 months, focusing on removing soap scum and mineral deposits that can compromise their integrity.
Start by spraying a penetrating lubricant specifically designed for bathroom fixtures into each hinge point.
Don’t use WD-40, as it can attract dirt and cause premature wear.
Work the door back and forth to distribute the lubricant evenly.
Next, tighten any loose screws with the appropriate screwdriver, being careful not to overtighten and strip the threads.
If you notice any rust forming, address it immediately with a rust converter and protective coating to prevent further deterioration.
Seal Protection Methods
Protecting glass shower door seals requires a thorough approach to prevent water leakage and extend their lifespan.
You’ll want to apply a silicone-based protectant to your seals every three months, working it into the rubber with a microfiber cloth.
Don’t skip the corners, where seal damage often begins.
Remove mineral deposits weekly using a 50/50 mix of white vinegar and water.
Spray the solution directly on the seals, let it sit for 5 minutes, then wipe clean. For stubborn buildup, use a soft brush with nylon bristles.
You’re better off avoiding harsh chemicals that’ll break down the rubber compounds.
Keep your seals dry between showers by running a squeegee along their length.
This simple habit prevents mold growth and stops premature deterioration of the rubber material.
Homemade Glass Cleaner Recipe

Making your own glass shower cleaner starts with combining 2 cups of distilled water, ½ cup of white vinegar, ¼ cup of rubbing alcohol, and 1 tablespoon of cornstarch in a spray bottle.
Shake the mixture vigorously until the cornstarch dissolves completely.
The alcohol accelerates drying time, while cornstarch acts as a water spot preventer.
You’ll want to label your bottle and remix the solution before each use, as ingredients may separate over time.
When applying, spray the mixture liberally on your glass surfaces and let it sit for 2-3 minutes.
Wipe with a microfiber cloth using circular motions, then follow with a clean, dry microfiber cloth for a streak-free finish.
This DIY solution costs roughly 90% less than commercial cleaners and doesn’t contain harsh chemicals.
Ventilation Solutions
Proper ventilation serves as the cornerstone of maintaining a mold-free glass shower enclosure.
You’ll need to create an effective airflow system by installing a bathroom exhaust fan rated at least 50 CFM (cubic feet per minute) for every 50 square feet of bathroom space.
Don’t rely solely on mechanical ventilation. Leave your shower door open 4-6 inches after each use, and consider installing a shower squeegee hook within arm’s reach.
For enhanced air circulation, mount a small, moisture-resistant fan in the corner of your shower space.
If you’re dealing with a windowless bathroom, upgrade to a humidity-sensing fan that automatically activates when moisture levels rise above 60%.
This dual approach – mechanical ventilation plus strategic air movement – will dramatically reduce condensation buildup on your glass surfaces.
Rain-X For Shower Doors

While ventilation helps prevent water spots, Rain-X offers an additional layer of defense for your glass shower doors.
This water-repelling product, originally designed for car windshields, creates an invisible hydrophobic barrier that causes water to bead up and roll off your shower glass.
To apply Rain-X effectively, first clean and dry your shower doors thoroughly.
Apply the product in a circular motion using a lint-free microfiber cloth, then let it dry for 5-10 minutes.
Buff the surface with a clean cloth until it’s crystal clear.
You’ll need to reapply every 2-3 months, but the protection is worth the effort.
Not only will water spots become less frequent, but you’ll also spend less time wiping down the glass after each shower.
Consider this your first line of defense against mineral buildup.
Dryer Sheet Glass Cleaning
Beyond conventional cleaning methods, used dryer sheets serve as an unexpected yet effective tool for maintaining spotless glass shower doors.
The fabric softening agents in these sheets break down soap scum and mineral deposits while creating an invisible barrier that repels future buildup.
To implement this hack, slightly dampen a used dryer sheet and wipe down your glass doors using circular motions.
You’ll notice the sheet’s texture helps lift stubborn residue without scratching.
For tough spots, let the sheet rest on the area for 30 seconds before scrubbing.
The antistatic properties will also help prevent dust and water spots from adhering to the surface.
You can even keep a few used sheets in your bathroom for quick touch-ups between deep cleanings.
This money-saving technique transforms your would-be trash into a practical cleaning solution.
Vinegar Steam Clean Hack

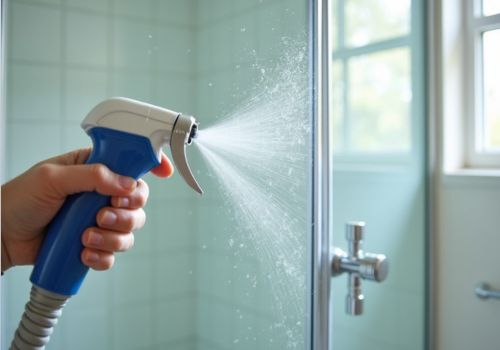
To harness the power of steam cleaning, combine equal parts white vinegar and hot water in a spray bottle for a highly effective shower door cleaning solution.
After your shower, while the bathroom’s still steamy, spray the mixture liberally on your glass doors.
The residual heat activates the vinegar’s cleaning properties, breaking down stubborn soap scum and mineral deposits.
Let the solution sit for 5-10 minutes while the steam continues to work.
You’ll notice the grime beginning to dissolve.
Wipe down the glass using a microfiber cloth, working in circular motions from top to bottom.
For tough spots, spray additional solution directly on the problem areas.
This natural cleaning method not only saves you money but also keeps you free from harsh chemical cleaners and their fumes.
Track Cleaning Shortcuts
Three main areas of shower door tracks consistently harbor soap scum, mold, and mineral deposits: the bottom rail, corner joints, and weep holes.
You’ll save significant cleaning time by targeting these spots with a compressed air canister to blast out debris, followed by a vinegar-soaked cotton rope pressed into the track for 30 minutes.
For stubborn buildup, wrap dental floss around your fingers and run it through the track’s grooves like you’re flossing teeth.
You can also repurpose old gift cards as scraping tools to remove hardened residue without scratching the metal.
Don’t forget to clear the weep holes using a straightened paper clip, then flush with hydrogen peroxide to dissolve any remaining gunk.
Finish by spraying a silicone-based lubricant to prevent future buildup.
FAQs
How Much Weight Can Frameless Glass Shower Doors Safely Support?
You can safely rely on properly installed frameless shower doors to support 70-80 pounds of force. Don’t exceed this limit, as your door’s tempered glass panels and mounting hardware aren’t designed for additional weight or stress.
Can Shower Door Glass Shatter Spontaneously in Extreme Temperature Changes?
Ever seen tempered glass explode? Your shower door can shatter spontaneously due to nickel sulfide inclusions expanding differently during temperature swings. You’ll want to avoid extreme hot-cold changes to prevent this rare but possible occurrence.
What’s the Average Lifespan of Shower Door Hardware Before Replacement?
You’ll typically need to replace your shower door hardware every 5-7 years, though quality components can last 10+ years. Regular maintenance and corrosion prevention can extend lifespan, especially for hinges and handles.
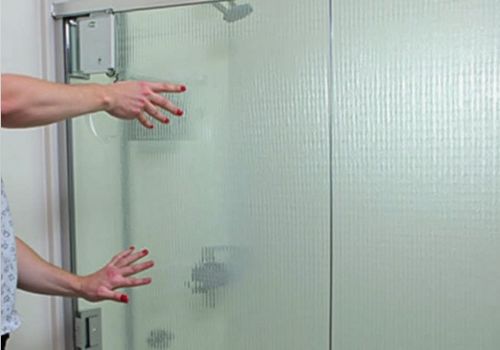
Are Textured Glass Shower Doors More Difficult to Keep Clean?
Yes, you’ll find textured glass shower doors require more effort to clean. The uneven surface traps soap scum, minerals, and debris in microscopic grooves, making it harder to wipe down completely compared to smooth glass.
Can I Install a Frameless Shower Door on a Fiberglass Surround?
Want a sleek look for your bathroom? You can install a frameless door on fiberglass, but you’ll need special mounting hardware and reinforcement plates to distribute weight properly. Always verify your surround’s structural integrity first.
Final Thoughts
You’ll find these time-tested techniques quintessential for preserving your shower’s pellucid beauty while maintaining your financial prudence.
By implementing these methodologies, particularly the daily squeegee protocol, you’re effectively forestalling costly repairs and replacements.
The combination of modern solutions like Rain-X with erstwhile practices such as vinegar steaming creates an ideal maintenance regimen.
Your glass shower doors will maintain their pristine condition while your wallet remains substantively heavier.